
Base vs. Wall Kitchen Cabinet Heights From the Floor
For cabinets installed before flooring, transfer the planned finished-floor elevation to the walls and account for the entire floor assembly.
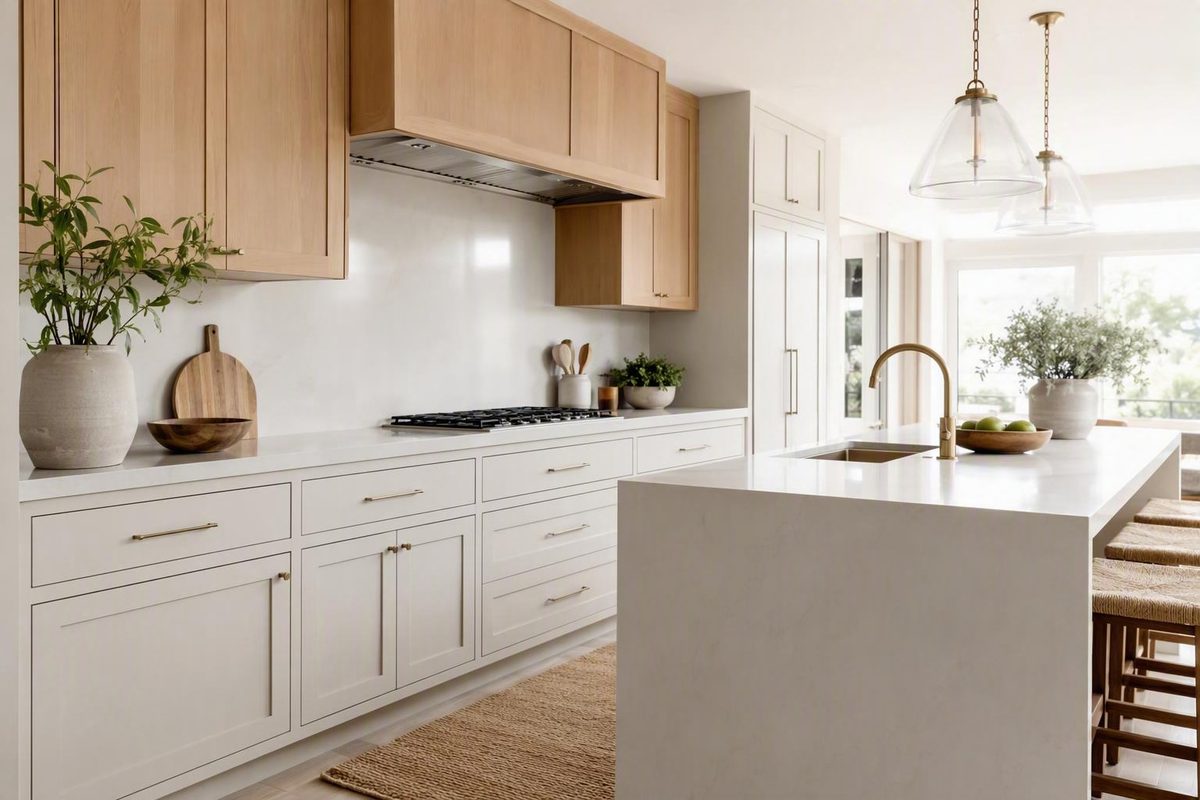
Kitchen cabinet height from the floor is not a single measurement. In a typical North American stock-cabinet layout, the base-cabinet box is 34.5 inches high, the finished countertop is about 36 inches high, and the bottom of an ordinary wall-cabinet run begins about 54 inches above the finished floor. Tall cabinets commonly stand 84, 90, or 96 inches high. These are planning conventions, not universal code requirements. Highland Cabinetry summarizes the same common dimensions and their principal design variables.
Final elevations must reflect the actual flooring and countertop construction, ceiling conditions, cabinet trim, appliance instructions, installation tolerances, and the needs of the people who will use the kitchen.
Kitchen cabinet heights at a glance
The table separates cabinet-box dimensions from floor-based installation elevations. That distinction is essential: 54 inches normally identifies the elevation of the wall cabinet’s bottom edge, not the height of the cabinet itself.
| Cabinet type or surface | What is being measured? | Typical measurement |
|---|---|---|
| Base cabinet | Cabinet-box height before countertop | 34.5 in. |
| Finished countertop | Finished floor to top of work surface | About 36 in. |
| Wall cabinet | Finished floor to bottom edge | About 54 in. |
| Wall cabinet | Height of cabinet box itself | Commonly 30, 36, or 42 in. |
| Tall or pantry cabinet | Height of cabinet unit itself | Commonly 84, 90, or 96 in. |
These figures reflect common North American stock-kitchen planning. A 34.5-inch base box with a typical 1.5-inch countertop produces an approximately 36-inch work surface. Leaving an 18-inch opening above that surface places the wall-cabinet bottom at 54 inches. Tall cabinets are commonly available in 84-, 90-, and 96-inch heights. Aspen Kitchens provides a comparable overview of base, wall, and tall cabinet dimensions.
Do not convert these defaults into automatic installation instructions. A thicker countertop, raised platform, sloping floor, low soffit, crown molding, or appliance-specific clearance can alter the finished layout. User reach and mobility may also justify a different work-surface or wall-cabinet elevation.
Know which cabinet measurement you are asking for
“Cabinet height” can describe at least five dimensions. Cabinet orders, elevation drawings, and installation plans should label each one explicitly.
- Base-cabinet box height: The height of the cabinet unit before the countertop is installed.
- Finished countertop height: The elevation from the finished floor to the top of the completed work surface.
- Wall-cabinet bottom elevation: The distance from the finished floor to the wall cabinet’s lower edge.
- Wall-cabinet box height: The physical height of the wall-cabinet unit.
- Wall-cabinet top elevation: The distance from the finished floor to the top of the installed wall cabinet.
Base- and tall-cabinet heights generally describe the units themselves. The familiar 54-inch wall-cabinet measurement is different: it describes where the cabinet begins above the floor. Wall-cabinet boxes are commonly 30, 36, or 42 inches high, so their top elevations vary even when their bottoms share the same mounting line. Planner 5D distinguishes these box heights from the conventional 54-inch installation elevation.
If cabinets must be installed before the flooring, establish and mark the planned finished-floor level first.
A conceptual elevation looks like this:
Wall-cabinet top elevation
┌─────────────────────────────┐
│       Wall cabinet          │  ← box height: 30, 36, or 42 in.
└─────────────────────────────┘  ← bottom commonly at 54 in.
             ↑
       18-in. nominal gap
             ↓
═══════════════════════════════  ← finished counter about 36 in.
        countertop layer
┌─────────────────────────────┐
│      34.5-in. base box      │
└─────────────────────────────┘
───────────────────────────────  ← finished floor: 0 in.
The diagram is a planning aid, not a project-specific installation drawing. Its purpose is to keep the cabinet box, countertop, open workspace, and mounting line distinct.
Confusing box height with mounting elevation can cause a serious ordering or installation error. A “36-inch wall cabinet” is a box that measures 36 inches vertically; it is not normally a cabinet whose bottom begins 36 inches above the floor. If its bottom is at 54 inches, its top is at 90 inches.
Use complete labels on drawings and purchase orders:
- “Base box: 34.5 inches high”
- “Finished counter: 36 inches AFF”
- “Wall-cabinet bottom: 54 inches AFF”
- “Wall-cabinet box: 36 inches high”
- “Wall-cabinet top: 90 inches AFF”
“AFF” means above finished floor. Define the abbreviation on the drawing so the supplier, fabricator, and installer use the same reference point.
Base-cabinet and countertop height from the floor
The conventional base calculation is:
34.5-inch base-cabinet box + 1.5-inch countertop assembly = approximately 36-inch finished work surface
A cabinet retailer’s dimensional guide lists the same 34.5-inch base box and 1.5-inch countertop combination for a finished height of about 36 inches. See the cabinet-size planning chart from CNT Cabinet.
Keep the two measurements separate:
- 34.5 inches is the nominal height of the base-cabinet box.
- Approximately 36 inches is the elevation of the completed countertop surface.
The complete countertop assembly is not always exactly 1.5 inches thick. Other assemblies may be thinner. A nominal 34.5-inch cabinet therefore does not guarantee an exact 36-inch finished surface.
A more precise project formula is:
Finished counter elevation = elevation of the installed top of the base-cabinet box + actual countertop assembly thickness
The first input means the height of the cabinet box’s top edge above the finished-floor reference—not the elevation of the cabinet’s bottom.
Resolve the floor before marking cabinet heights
Determine whether the finished flooring will:
- continue beneath the base cabinets;
- stop at the cabinet or toe-kick line;
- be installed before or after the cabinets; or
- change thickness within the room.
Document the planned finished-floor elevation before approving cabinet heights. If two flooring materials meet in the kitchen, identify which finished surface controls each cabinet and appliance measurement.
Treat 36 inches as a starting point
An approximately 36-inch counter is a common stock-kitchen default, but it is not necessarily the best work-surface height for every user or task. Household stature, seated or standing use, mobility, joint movement, and the work performed at each station may justify a different elevation.
Test the proposed surface with its intended users rather than selecting an alternative from a generic chart and assuming it is suitable. If formal accessibility obligations apply, coordinate the design with the primary standards and local requirements governing that project.
Changing the counter height can also affect:
- dishwasher and range relationships;
- sink and plumbing placement;
- window-sill clearance;
- end panels and finished sides;
- backsplash dimensions;
- wall-cabinet mounting lines; and
- transitions to adjoining counters.
Worked example: a thicker countertop
Suppose the cabinet box remains 34.5 inches high, but the complete countertop assembly is 2 inches thick:
34.5 + 2 = 36.5-inch finished counter elevation
If the wall-cabinet bottom remains fixed at 54 inches:
54 − 36.5 = 17.5 inches of open space
To retain an 18-inch opening, move the cabinet-bottom line to:
36.5 + 18 = 54.5 inches
The thicker top raises the work surface and reduces the space below a fixed wall cabinet. That is why the countertop construction should be established before the upper-cabinet mounting line is finalized.
How to calculate wall-cabinet height
Use this formula for an ordinary wall-cabinet run:
Actual finished counter elevation + desired open clearance = wall-cabinet bottom elevation
For the conventional layout:
36-inch finished counter + 18-inch opening = 54-inch wall-cabinet bottom
The 18-inch opening is common practice, not a universal legal requirement. Appliance locations may require different treatment, and selected-product instructions take priority. Lanae’s cabinet-spacing overview presents the conventional calculation while noting that appliances can change it.
Always calculate from the actual finished counter elevation. Assuming every counter is exactly 36 inches can produce the wrong opening when the countertop assembly, cabinet platform, or flooring differs from the nominal plan.
Once the bottom line is known, calculate the top:
Wall-cabinet bottom elevation + cabinet-box height = wall-cabinet top elevation
For cabinets beginning at 54 inches:
| Wall-cabinet box height | Bottom elevation | Top elevation |
|---|---|---|
| 30 in. | 54 in. | 84 in. |
| 36 in. | 54 in. | 90 in. |
| 42 in. | 54 in. | 96 in. |
A 36-inch cabinet beginning at 54 inches therefore ends at 90 inches, not 84 inches.
Example with a higher counter
For a 38-inch finished counter and an 18-inch opening:
38 + 18 = 56-inch wall-cabinet bottom elevation
A 36-inch wall cabinet mounted there ends at:
56 + 36 = 92 inches
The box has not changed size. Its bottom and top elevations have both moved upward because the counter is higher.
Example with a user-adjusted cabinet position
Suppose the counter is 36 inches high and user testing suggests a 16-inch opening:
36 + 16 = 52-inch wall-cabinet bottom elevation
The arithmetic works, but the layout still needs practical review. Before approving that line, check:
- coffee makers, mixers, blenders, and knife blocks;
- appliance lids, reservoirs, and tilting heads;
- outlets, switches, plugs, and cords;
- under-cabinet lighting and trim;
- backsplash details;
- sightlines and workspace visibility; and
- adjacent appliance or cabinet requirements.
A lower mounting line is not inherently wrong, just as 54 inches is not automatically right for every household. The complete elevation must remain functional.
Choosing wall and tall cabinets for the ceiling
Full-kitchen wall cabinets commonly come in 30-, 36-, and 42-inch box heights, with shorter specialty cabinets available for refrigerators, windows, and appliance zones. Tall or pantry cabinets commonly come in 84-, 90-, and 96-inch heights. Prime Cabinetry’s planning guide summarizes these typical product dimensions.
Use this formula to test ceiling fit:
Ceiling height − wall-cabinet bottom elevation − cabinet-box height = nominal space above cabinet
For a 96-inch ceiling and cabinets beginning at 54 inches:
| Cabinet-box height | Cabinet-top elevation | Nominal space below ceiling |
|---|---|---|
| 30 in. | 84 in. | 12 in. |
| 36 in. | 90 in. | 6 in. |
| 42 in. | 96 in. | 0 in. |
“Nominal” is important. Zero space in the arithmetic does not prove that the cabinet can be installed tightly against the actual ceiling.
Why a nominally ceiling-height cabinet may not fit
A 42-inch upper beginning at 54 inches mathematically reaches a 96-inch ceiling. The actual installation may still need room for:
- crown molding;
- ceiling variation across the run;
- hanging or assembly movement;
- scribes and fillers;
- out-of-level walls or ceilings;
- suspension hardware; and
- alignment with nearby tall cabinets.
For the zone above the cabinet, use:
Usable cabinet zone = ceiling height − bottom elevation − above-cabinet trim or soffit allowance − installation allowance
Compare that result with the cabinet-box height before approving the order.
Evaluate light rail separately. Because light rail is normally installed below the wall cabinet, it does not reduce the ceiling space above the box.
Options for an 8-foot ceiling
With a 96-inch ceiling and a 54-inch cabinet-bottom line:
- A 30-inch cabinet ends at 84 inches and leaves 12 nominal inches above.
- A 36-inch cabinet ends at 90 inches and leaves 6 nominal inches above.
- A 42-inch cabinet ends at 96 inches and nominally reaches the ceiling.
None is automatically best. Shorter cabinets can preserve room for trim or deliberate open space. Taller cabinets provide more storage and a full-height appearance, but the highest shelves may be harder to reach and the installation has less tolerance.
Options for 9- and 10-foot ceilings
Higher ceilings create design choices rather than one mandatory answer. Options include:
- taller upper cabinets;
- stacked cabinets;
- small display cabinets above the main run;
- deliberate open space;
- extended crown treatments;
- soffits or architectural transitions; and
- custom-height cabinetry.
Recommendations vary because storage priorities, proportions, and aesthetics differ. A single row of tall uppers may suit one 9-foot room, while stacked cabinets or open space may work better in another.
Tall cabinets require the same scrutiny. Confirm what the listed cabinet height includes, allow for trim and installation, and determine whether the assembled unit can be stood upright in the available room height.
When standard cabinet heights should change
Typical dimensions are starting points. User reach, stature, mobility, storage priorities, and daily tasks can justify changing the work-surface or wall-cabinet elevation.
The principal wall-cabinet tradeoff is straightforward:
- Taller cabinets increase storage, but their upper shelves may be difficult to reach.
- Lower wall cabinets improve access to lower shelves, but reduce the open space over the counter.
A lower cabinet may help one user while making the counter feel confined to another. It can also move the cabinet face into a standing or seated user’s sightline.
Test shelves, not only the cabinet bottom
The bottom edge is easy to mark, but shelf positions determine how useful the cabinet will be.
Use painter’s tape to mark:
- cabinet bottoms and tops;
- lower, middle, and upper shelf positions;
- the countertop surface;
- cabinet depth or front projection;
- crown molding; and
- below-cabinet light rail.
Ask intended users to simulate reaching for plates, glasses, spices, and frequently used food. Reserve difficult-to-reach shelves for occasional-use storage rather than assuming all of the cabinet’s nominal volume is equally accessible.
Check the counter zone
Before lowering wall cabinets, mock up everything expected below them:
- coffee maker;
- stand mixer;
- blender;
- toaster;
- knife block;
- countertop oven;
- utensil storage; and
- paper-towel holder.
Measure appliances in their operating positions. A coffee maker may need top access for water; a mixer may require room for its head to tilt; a blender jar may need to lift vertically from its base.
Also verify outlets, switches, under-cabinet lighting, backsplash terminations, and sightlines.
Consider the cost of moving installed cabinets
Lowering cabinets after installation may affect:
- end panels;
- crown molding;
- scribes and fillers;
- backsplash tile or wall finish;
- pantry and refrigerator-cabinet alignments;
- under-cabinet wiring and lighting;
- exposed mounting holes; and
- hood or appliance relationships.
For that reason, full-scale testing is most valuable before the cabinets are ordered or installed.
Accessibility requires project-specific review
Do not treat one generalized reach height or countertop dimension as accessible or compliant for every person, occupancy, or jurisdiction. Where formal accessibility obligations apply, consult the applicable primary standards and local authority.
Where no formal requirement controls, test the complete kitchen with its intended users. Review work surfaces, storage, knee clearance where needed, controls, appliances, routes, and assisted use rather than optimizing one cabinet dimension in isolation.
Cabinet heights around appliances and special zones
Plan the ordinary wall-cabinet run and each appliance zone separately. The conventional 18-inch opening above a counter must never override the instructions for a selected range, cooktop, ventilation hood, or over-the-range microwave.
For each cooking and ventilation product, verify:
- required vertical clearance and its exact measurement points;
- separation from combustible cabinetry or trim;
- ventilation configuration;
- mounting height;
- cabinet width and depth restrictions;
- permitted adjacent-cabinet positions; and
- duct and utility locations.
Manufacturer requirements vary by model. A generalized range, hood, or microwave dimension from a secondary planning guide must not be copied into the construction documents as a substitute for the selected products’ manuals. Check applicable local requirements as well as the appliance and ventilation instructions. Expo Home Improvement likewise treats appliance placement as a condition that can alter ordinary cabinet positioning.
Above a range, cooktop, hood, or microwave
A cooking zone may require a shorter cabinet, a raised cabinet bottom, a purpose-built hood enclosure, or no cabinet directly above the appliance. The correct arrangement depends on the selected products.
Do not assume a clearance stated for one configuration applies to another.
Follow the documentation’s exact reference points.
Above a refrigerator
Cabinet placement above a refrigerator depends on:
- the appliance’s actual overall and hinge height;
- required top, side, and rear ventilation;
- door and hinge movement;
- surrounding panels;
- whether the refrigerator is freestanding, counter-depth, or built in; and
- the depth and height of the cabinet above it.
Short specialty cabinets are commonly used above refrigerators. These cabinets may also be deeper than ordinary wall cabinets, but their placement must be coordinated with the selected refrigerator.
Use the manufacturer’s dimensional drawing rather than the advertised refrigerator size. Record the hinge height, door-swing envelope, required air space, connections, and any enclosure or anti-tip provisions.
Above a sink
Draw the following elements together in elevation:
- sink and faucet;
- faucet arc and pull-down spray movement;
- window and trim;
- wall-cabinet depth;
- lighting;
- dish storage or drying arrangements; and
- user head and shoulder clearance.
Avoid applying a generalized sink-to-cabinet number to every kitchen. The complete assembly matters more than an isolated dimension.
How to measure and mark cabinet elevations before installation
Begin every vertical measurement at the planned finished-floor level. Document whether flooring will continue beneath the cabinets or terminate at the cabinet or toe-kick line.
Measure floor-to-ceiling height at several points along each cabinet run because floors and ceilings may not be level. A cabinet retailer’s measuring guide specifically recommends taking multiple room-height measurements to reveal variation. See the measurement guidance from Unfinished Kitchen Cabinets.
Establish one level reference
Do not measure every cabinet independently upward from a sloping floor. Instead:
- Confirm the planned finished-floor reference.
- Identify the floor’s high point across the run.
- Establish a level reference line with an appropriate leveling instrument.
- Derive cabinet and countertop elevations from that common line.
- Record where shims, scribes, or fillers will absorb site variation.
The installation method should follow the cabinet manufacturer’s instructions and actual site conditions.
Record the complete vertical stack
For every cabinet run, document:
- finished-floor elevation;
- actual base-box height;
- platform or shimming allowance;
- countertop substrate and build-up;
- countertop material thickness;
- finished counter elevation;
- desired open space above the counter;
- wall-cabinet bottom elevation;
- wall-cabinet box height;
- wall-cabinet top elevation;
- light rail below the cabinet;
- crown or trim above it; and
- remaining space to the ceiling or soffit.
Complete both calculations:
Finished counter elevation + desired opening = cabinet-bottom elevation
Cabinet-bottom elevation + cabinet-box height = cabinet-top elevation
The second equation is the final arithmetic check. A drawing showing a 54-inch cabinet bottom and a 36-inch box must show a 90-inch top. If it does not, either the drawing or the order is wrong.
Verify architectural and service conflicts
Check every elevation against:
- soffits and ceiling beams;
- crown molding, fillers, and scribes;
- windows, doors, casing, and trim;
- outlets and switches;
- plumbing, gas, and electrical connections;
- ductwork;
- under-cabinet lighting;
- backsplash details; and
- required structural backing or mounting locations.
Produce elevations for each cabinet wall and special zone.
Insert appliances before ordering cabinets
Place every selected appliance into the elevation drawing using its actual documentation. Include:
- overall and opening dimensions;
- door and drawer movement;
- hinge height;
- ventilation space;
- mounting position;
- utility connections;
- trim kits and fillers; and
- manufacturer-required clearances.
Do this before cabinetry is ordered.
Mock up the room
Use painter’s tape to mark:
- finished counter height;
- wall-cabinet bottoms and tops;
- cabinet sides and front projection;
- shelf positions;
- tall-cabinet height;
- crown molding;
- refrigerator and range outlines; and
- major appliance-door swings where practical.
View the mock-up from normal standing and seated positions. Test reach with intended users and place countertop appliances inside the proposed opening.
For a broader overview of cabinet modules and layout dimensions, consult Cabinet Data’s kitchen cabinet sizes reference.
Final sign-off checklist
Before fabrication, ordering, or installation, confirm:
- [ ] The homeowner approves the counter, cabinet, and shelf heights after full-scale testing.
- [ ] The cabinet supplier confirms actual box heights and trim requirements.
- [ ] The countertop fabricator confirms the complete top thickness and build-up.
- [ ] The appliance supplier or installer confirms model-specific dimensions and clearances.
- [ ] The cabinet installer confirms the finished-floor reference and level installation lines.
- [ ] Flooring placement beneath or against the cabinets is documented.
- [ ] Ceiling height has been measured at several points.
- [ ] Crown, fillers, soffits, and installation allowances are included.
- [ ] Light rail has been checked against the opening below the wall cabinets.
- [ ] Outlets, lighting, plumbing, wiring, and ventilation are coordinated.
- [ ] The cabinet-bottom elevation plus the box height equals the planned top elevation.
- [ ] Everyone is working from the same dated, approved elevation drawings.
Frequently asked questions
Is kitchen cabinet height measured from the finished floor or the subfloor?
Plan floor-based cabinet elevations from the finished floor. If cabinets must be installed before the flooring, transfer the planned finished-floor elevation to the walls and account for the entire floor assembly.
Also document whether flooring will run beneath the cabinets or stop against them. That decision can affect apparent counter height and adjacent appliance openings.
Does the 54-inch wall-cabinet height refer to the bottom or top of the cabinet?
It refers to the bottom edge of the wall cabinet. It is a mounting elevation above the finished floor, not the cabinet’s box height or top elevation. A 30-inch cabinet beginning at 54 inches ends at 84 inches; a 36-inch cabinet ends at 90 inches; and a 42-inch cabinet ends at 96 inches. Cabinet Door Store explains the same distinction between the upper-cabinet mounting line and cabinet-box dimensions.
How high should upper cabinets be above a 36-inch countertop?
An ordinary upper-cabinet run commonly begins about 18 inches above a 36-inch finished countertop, placing the cabinet bottom approximately 54 inches above the finished floor.
Treat that opening as a planning default. Users, countertop appliances, lighting, outlets, backsplash details, and cabinet construction may justify another dimension. Appliance zones must follow the selected products’ instructions and applicable local requirements.
Can upper kitchen cabinets be installed lower than 54 inches?
Yes. For example, a 16-inch opening above a 36-inch counter places the cabinet bottom at 52 inches.
Before lowering it, test the bottom edge and shelf positions with intended users. Check countertop appliances in their operating positions, outlets, lighting, backsplash details, sightlines, workspace, and adjacent cabinet alignments.
Will a 42-inch wall cabinet reach an 8-foot ceiling?
Nominally, yes. An 8-foot ceiling is 96 inches high, and a 42-inch cabinet beginning at 54 inches has a top elevation of 96 inches:
54 + 42 = 96 inches
That arithmetic does not guarantee a practical zero-clearance installation. Crown molding, fillers, ceiling variation, hanging movement, and out-of-level conditions may require additional space.
The reliable planning sequence is to begin at the finished floor, distinguish the 34.5-inch base box from the approximately 36-inch finished counter, and calculate the wall-cabinet bottom from the actual counter elevation plus the chosen opening. Then add the cabinet-box height to verify the top elevation.
Treat 54 inches as a useful default, but approve the final layout only after checking the users, flooring, countertop construction, ceiling, trim, appliances, ventilation instructions, and applicable local requirements.