
What Kitchen Sink Cabinet Size Do You Need?
For many conventional sinks, about 24 to 27 inches is a reasonable preliminary sink-width range when planning around a 30-inch base cabinet.
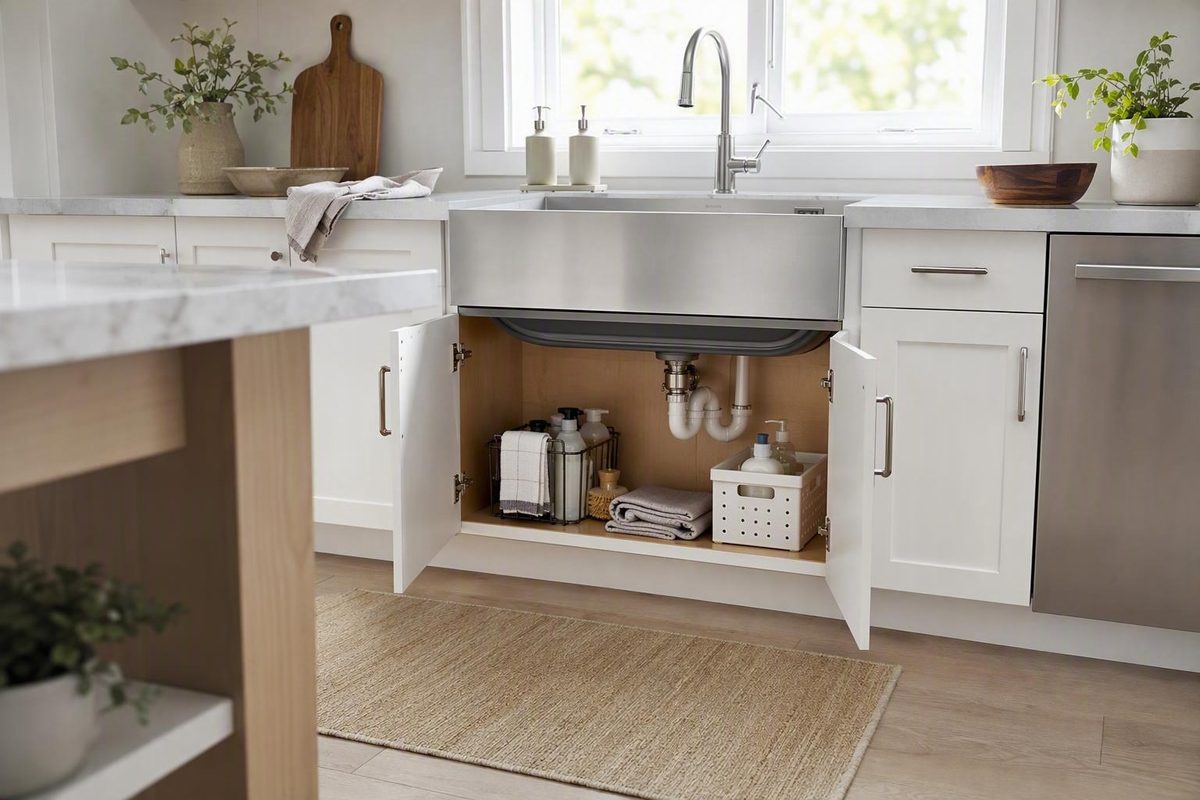
Choosing a kitchen sink cabinet size starts with familiar stock dimensions, but it cannot end there. A cabinet labeled 30 inches wide does not provide 30 inches of unobstructed interior space, and a sink marketed as a 30-inch model may have a rim, flange, supports, or installation requirements that call for a wider base.
Reliable planning separates four measurements: the cabinet’s nominal exterior width, its usable interior space, the sink’s exact dimensions, and the sink manufacturer’s stated minimum cabinet size. Countertop cutouts, mounting hardware, structural supports, plumbing, and installation access must then be reconciled with those measurements.
The quick answer: common kitchen sink cabinet dimensions
A North American stock sink-base cabinet is commonly about 34.5 inches high and 24 inches deep before the countertop. An approximately 1.5-inch countertop commonly brings the finished work surface to about 36 inches high. Width varies, with 27-, 30-, 33-, and 36-inch sink bases serving as useful stock planning points. Vanity Art’s cabinet-dimension guide documents the common height, depth, countertop thickness, and 3-inch width pattern.
| Measurement | Typical cabinet-box dimension | Finished dimension or planning note |
|---|---|---|
| Height | About 34.5 inches | A countertop around 1.5 inches thick commonly produces a work surface near 36 inches |
| Depth | About 24 inches | Countertop overhang increases the finished front-to-back projection |
| Width | Common choices include 27, 30, 33, and 36 inches | Availability varies by cabinet line |
| Width pattern | Often offered in 3-inch steps | A stock-planning convention, not a compatibility guarantee |
These figures describe the cabinet box. Countertop thickness changes finished work-surface height, not the nominal height of the cabinet itself. Likewise, countertop overhang changes finished projection without making a 24-inch-deep cabinet box physically deeper.
Commercial product listings confirm that 27-, 30-, 33-, and 36-inch sink bases are available, including examples listed at 34.5 inches high with a 24-inch third dimension. Those products demonstrate availability rather than an industry-wide limit on cabinet sizes. See Cabinet Sales Center’s listed sink-base dimensions.
Cabinet widths frequently follow a 3-inch module because it simplifies stock manufacturing and layout arithmetic. The module does not ensure that cabinets from different brands will align. Face frames, door overlays, side-panel construction, rails, finished ends, and toe-kick details can differ even when two cabinets carry the same nominal dimensions.
Cabinet Data’s general reference, for example, describes base cabinets as 34.5 inches high and 24 inches deep and identifies a narrower 30- to 36-inch range for sink bases. That is the range used in its article, not a claim that 27-inch, 42-inch, custom, or other sink bases do not exist. Review Cabinet Data’s kitchen cabinet size reference.
Planning qualification: These are common North American stock-cabinet dimensions. The specifications for the selected cabinet, sink, countertop, and mounting system control the installation.
There is no single universal kitchen sink cabinet width. Height and depth provide useful starting points; width must be selected around the actual sink and surrounding layout.
Nominal cabinet size is not usable sink space
The number in a cabinet model name generally describes its nominal exterior width: the left-to-right dimension across the outside of the cabinet box. An SB30 is ordinarily planned as a 30-inch-wide unit in the cabinet run, but that label does not reveal how much clear space exists inside or through the front opening.
Keep these terms separate:
- Nominal cabinet width: The labeled exterior left-to-right cabinet dimension.
- Usable interior width: The clear interior space after side panels and relevant obstructions are considered.
- Cabinet opening width: The opening through which the sink, hardware, tools, or plumbing components must pass.
- Minimum cabinet size: The cabinet measurement required by the sink manufacturer. It often refers to nominal cabinet width, but the selected manufacturer’s documents should be checked for its exact definition.
Nominal width positions the cabinet in the kitchen plan. Interior width describes the cavity available to the sink. Opening width affects installation and service access. Minimum cabinet size is the sink maker’s model-specific requirement.
Consider a nominal 30-inch cabinet with two side panels that are each 3/4 inch thick:
- Exterior width: 30 inches
- Left side panel: 3/4 inch
- Right side panel: 3/4 inch
- Approximate interior width before other obstructions: 28.5 inches
That calculation is only the first reduction. A face frame may narrow the front opening; rails or braces may occupy space near the sink flange; and clips, blocking, supports, plumbing, or cabinet hardware may reduce the practical installation zone. Allora’s undermount guidance uses the same 28.5-inch example and emphasizes usable interior width rather than the cabinet label alone. See Allora USA’s cabinet-to-sink sizing explanation.
Cabinet construction also determines where space is lost. A face-frame cabinet can have a front opening narrower than the cavity behind it. A frameless cabinet may offer a more open front while still having top rails, connectors, panel edges, or support components near the countertop. A sink that appears to fit in the lower cavity may not pass through the opening or leave room for hardware at the cabinet top.
The sink’s advertised size introduces another variable. A stated 30-inch width may describe the overall dimension across a rim or flange rather than the bowl or countertop cutout. On a drop-in sink, the cutout is normally smaller than the overall rim. On an undermount sink, the cutout depends on the approved template and intended reveal.
For that reason, matching equal advertised widths is usually a poor starting assumption. A 33-inch sink in a 33-inch cabinet leaves no nominal allowance for cabinet walls, a flange, supports, clips, or installation access. Such a pairing should be considered only when the exact sink and cabinet combination is expressly approved.
A planning drawing should label:
- Exterior cabinet width
- Usable interior width at the cabinet top
- Clear front opening
- Left and right side panels
- Face-frame stiles and upper rail, if present
- Structural top rails or braces
- Sink rim or undermount flange
- Likely clip or support zones
- Plumbing and disposal zones below the bowl
The drawing does not need to predict every fastener. Its purpose is to prevent the exterior cabinet label from being mistaken for clear installation space.
Planning chart for 27-, 30-, 33-, and 36-inch sink bases
This chart is a shortlisting tool, not a compatibility guarantee. It applies most directly to conventional undermount planning; drop-in, farmhouse, and specialized workstation sinks can follow different constraints.
| Nominal sink-base width | Preliminary sink-width starting point | Interpretation | Required verification |
|---|---|---|---|
| 27 inches | Approximately 23–24 inches | Common starting range for compact undermount models | Compare usable cabinet space with the stated minimum cabinet size and exact installation documents |
| 30 inches | Approximately 24–27 inches | Allows more room than an equal-width pairing | Compare usable cabinet space with the stated minimum cabinet size and exact installation documents |
| 33 inches | Approximately 29–30 inches | Possible where the opening, flange, supports, and plumbing allow | Compare usable cabinet space with the stated minimum cabinet size and exact installation documents |
| 36 inches | Many 30–33-inch models | Plausible for numerous sinks, subject to mounting style and model details | Compare usable cabinet space with the stated minimum cabinet size and exact installation documents |
Allora’s undermount-oriented table suggests 23–24 inches for a 27-inch cabinet, 26–27 inches for a 30-inch cabinet, 29–30 inches for a 33-inch cabinet, and 32–33 inches for a 36-inch cabinet. HOROW’s broader guide pairs a 24-inch sink with a 27-inch base, a 27-inch sink with a 30-inch base, a 30-inch sink with a 33- or 36-inch base, and a 33-inch sink with a 36-inch base. Compare HOROW’s sink-and-cabinet planning table.
These ranges come from commercially published planning guidance, not an independent technical standard. Their overlap is more useful than any fixed subtraction rule: the sink usually needs meaningful space beyond its advertised width for cabinet construction and installation components.
The chart deliberately gives a 24- to 27-inch range for a 30-inch base. A 24-inch sink may preserve extra installation and plumbing space. A 27-inch model may be appropriate when its manufacturer approves the cabinet and the actual interior remains clear. Neither fit is guaranteed by the chart.
When the sink has already been selected, reverse the lookup:
- A 24-inch sink often leads planners to investigate a 27- or 30-inch base.
- A 27-inch sink commonly leads to a 30-inch base.
- A 30-inch sink often calls for a 33- or 36-inch base.
- A 33-inch sink commonly leads to a 36-inch base.
For a 30-inch sink, a 33-inch cabinet may be the approved minimum for some models. A 36-inch cabinet generally offers more potential room for clips, supports, plumbing, disposal access, and future service. That does not mean every 30-inch sink requires a 36-inch base or that every model fits every 33-inch cabinet.
The practical question is therefore not, “Can a 30-inch sink ever fit a 33-inch cabinet?” It is, “Does this sink approve that cabinet size, and does this cabinet provide the necessary usable space and access?”
Farmhouse exception: Do not infer apron-front compatibility directly from this chart. Farmhouse sinks interact with the cabinet front, doors, apron opening, support structure, and countertop differently from ordinary undermount sinks.
A chart can establish a search range. The sink’s specification sheet, installation guide, minimum cabinet requirement, and approved cutout template establish the model-level requirements.
How to measure the cabinet, sink, and countertop correctly
Begin with orientation. Manufacturers and retailers do not use length and width consistently, so rely on the arrows and labels in the technical drawing rather than the dimension name alone.
For this guide:
- Overall sink width is the left-to-right exterior dimension.
- Front-to-back dimension runs from the rear edge to the front edge.
- Bowl depth is the vertical measurement from the bowl bottom to its top or stated reference plane.
- Cutout dimensions describe the countertop opening, not the sink’s overall exterior size.
Cabinet measurement worksheet
Measure where the sink and its hardware will actually sit. Record exact figures rather than rounding them to a marketed whole-number size.
- Nominal exterior width: Outside left to outside right.
- Usable interior width at the top: Between the nearest relevant obstructions.
- Clear front opening: Between face-frame stiles or other restrictions.
- Interior depth: Available front-to-back space, including any back panel or plumbing chase.
- Interior height: Cabinet floor or support level to the cabinet top.
- Side-panel thickness: Record both sides.
- Face-frame intrusion: Record left, right, and upper restrictions separately.
- Rails and braces: Mark their sizes and positions.
- Existing or required supports: Note brackets, blocking, cradles, or reinforced areas.
- Door and hinge clearance: Identify hardware or accessories that enter the sink zone.
Measure at more than one point if the cabinet is not square or if an obstruction affects only part of the cavity. The narrowest relevant dimension controls.
Plumbing and equipment checks
Plot the complete under-sink assembly:
- Drain position
- P-trap
- Waste arm and wall connection
- Hot and cold supply lines
- Shutoff valves
- Garbage disposal, if used
- Dishwasher drain connection
- Filtration or instant-hot equipment
- Electrical receptacles and necessary service access
A sink can pass the width test and still fail because the bowl blocks the waste arm, the disposal strikes the cabinet floor, or a support conflicts with a shutoff valve. Centered and offset drains distribute the remaining plumbing and storage space differently.
Replacement-sink measurements
If the countertop will remain, measure:
- Existing sink’s exact overall width
- Existing sink’s exact front-to-back size
- Cutout width and front-to-back size
- Cutout corner radius
- Rim or flange width and shape
- Faucet and accessory holes
- Distance from the cutout to the backsplash and countertop front edge
The replacement must fit two independent constraints: the existing countertop opening and the cabinet beneath it. Fabuwood’s replacement guidance likewise calls for measuring the old sink, cabinet, cutout, and corner radius and recommends measuring twice. Its cabinet-minus-4-inch estimate is useful only for initial shopping, not final approval. See Fabuwood’s sink-measurement sequence.
A larger drop-in sink may cover an existing opening, but its required cutout must still leave suitable countertop material around the opening. An undermount replacement may require a different reveal, corner radius, edge finish, or cutout shape. Equal advertised sink widths do not establish equal cutouts.
Additional apron-front measurements
For a farmhouse or apron-front sink, also record:
- Exact apron width and height
- Required cabinet-front opening
- False-front or rail dimensions
- Door-to-apron clearance
- Countertop thickness and overhang
- Sink projection beyond the cabinet
- Required support height and locations
- Clearance for placing the sink
- Plumbing position relative to the deeper bowl
Support dimensions and methods must come from the selected model’s instructions. A generic cradle should not be assumed suitable for every sink material or cabinet.
Faucet clearance
Check the proposed faucet body, handle movement, pull-down hose, and mounting hardware against:
- The backsplash
- Window trim or ledge
- A wall or shelf
- Countertop overhang
- Sink ledges
- Workstation accessories
- Rear-deck components
Finally, treat “cabinet width minus 3 inches” and “cabinet width minus 4 inches” as shortlisting formulas only. Neither rule accounts for the actual face frame, rails, flange, supports, or mounting hardware. Measure twice, retain unrounded values, and compare them with the selected model’s technical drawing.
How mounting style changes the cabinet requirement
Mounting style determines which dimensions and clearances matter most. Undermount, drop-in, farmhouse, and workstation sinks cannot be evaluated with one universal side-clearance rule.
Undermount sinks
An undermount sink attaches below the countertop. Installation may require space for:
- The sink flange
- Mounting clips or an approved support system
- Countertop attachment and sealant
- Rails or blocking
- Tools and installer access
- Alignment with the countertop cutout
- Future repair or replacement
A 29-inch undermount sink in a nominal 30-inch cabinet illustrates the risk. If ordinary interior width is approximately 28.5 inches before face frames or other obstructions, the sink cannot simply be treated as a normal drop-in fit. A nonstandard installation may involve cabinet alterations, added blocking, and very precise positioning.
Such a tight fit can make alignment and sealing difficult, restrict future service, and increase the risk of leaks or damage to the sink flange, cabinet, or countertop. Cutting structural cabinet components can also weaken or distort them. Allora identifies these risks in its discussion of the same tight-fit example, so alterations should not proceed without approval for the exact sink, cabinet, countertop, and support system.
Drop-in sinks
A drop-in or top-mount sink has a rim resting on the countertop. Its critical dimensions include:
- Exact overall rim width and front-to-back size
- Required cutout dimensions
- Cutout corner radius
- Rim coverage
- Clearance for clips or fasteners below
- Faucet and accessory-hole positions
The countertop carries or locates the rim, but the bowl and hardware must still clear the cabinet sides, rails, backsplash zone, supports, and plumbing.
For a replacement, the rim must cover the opening as required while the bowl and hardware fit below it. A sink can have the right overall width and still be incompatible because the cutout is too large, too small, too close to the backsplash, or shaped with the wrong radius.
Farmhouse and apron-front sinks
A farmhouse sink exposes its apron and interacts directly with the cabinet face. Depending on the model, installation may require:
- A compatible sink base
- Changes to the false front, face frame, or doors
- A model-specific apron opening
- Countertop fabrication around the sink
- Dedicated support
- Plumbing relocation
- A different installation sequence
Sinkology’s farmhouse-specific guide recommends no more than about a 27-inch sink for a 30-inch cabinet and no more than about a 30-inch sink for a 33-inch cabinet. Those pairings apply to that manufacturer’s farmhouse guidance, not automatically to undermount or drop-in sinks. Review Sinkology’s farmhouse sizing table and checklist.
Some retrofit or self-trimming apron-front models are designed to reduce particular cabinet modifications. That feature must be verified for the exact model; it does not make every standard sink base suitable for every farmhouse sink.
Workstation sinks
A workstation sink includes ledges for accessories such as cutting boards, colanders, or drying racks. It still follows its underlying mounting type, but it adds operating-clearance questions.
Confirm that accessories can slide, rest, and be removed without striking:
- The faucet or handle
- A backsplash
- A side wall
- A window ledge
- Countertop overhang
- Soap dispensers or air switches
- Other ledge accessories
The ledge geometry can also change the sink’s exterior profile and below-counter space requirements. Workstation guidance emphasizes usable interior width, rails, mounting hardware, plumbing, and accessory operation rather than advertised width alone. See The Sink Boutique’s workstation installation considerations.
The distinction is simple: undermount sinks prioritize flange, support, and installer clearance; drop-ins depend heavily on rim and cutout geometry; farmhouse sinks add apron and structural requirements; and workstation sinks add accessory operating space.
Width is only the first fit test
Passing the width test means only that the sink remains a candidate. Front-to-back space, vertical clearance, plumbing geometry, supports, and countertop conditions can still prevent installation.
Front-to-back conflicts
The sink must fit between the countertop’s front edge and rear working zone. Possible conflicts include:
- Too little countertop material in front of the cutout
- Insufficient faucet-deck space behind the bowl
- Backsplash thickness
- Window trim or ledge projection
- Cabinet top rails
- Countertop overhang
- A deep sink flange
- Access needed for undermount clips
Moving the cutout is not always an adequate fix. A shift can create new conflicts with the cabinet, faucet, countertop edge, or surrounding surfaces.
Bowl depth and under-sink height
A deeper bowl extends farther into the cabinet. Below it, the strainer, disposal, P-trap, and waste arm need vertical space. The complete assembly may strike the cabinet floor or fail to align with the existing wall connection.
Depth can also affect access to shutoff valves, filter placement, cleaning-supply storage, disposal removal, pull-outs, and dishwasher-drain routing. Measure or sketch the complete vertical assembly rather than considering bowl depth alone.
Drain position
A centered drain places the plumbing beneath the middle of the bowl. An offset drain moves the trap or disposal to one side, which may preserve storage elsewhere or better match existing plumbing. It may also create a conflict with a side panel, support, shutoff valve, or filtration unit.
Neither arrangement is inherently better. The correct location is the one that works with the waste arm, equipment, storage plan, and service access.
Hidden installation components
Components that consume otherwise usable space include:
- Undermount clips
- Support rails
- Brackets and blocking
- Farmhouse cradles
- Reinforced cabinet sides
- Apron-support kits
- Workstation ledges and accessory geometry
Their locations should come from the approved installation method. A cavity measured before supports are added may not remain clear afterward.
Heavy sinks and reinforcement
Some fireclay, cast-iron, granite-composite, or copper sinks may require reinforcement prescribed by the manufacturer. Possible systems include rails, brackets, cradles, reinforced sides, or a model-specific apron-support kit. The appropriate load path depends on the sink, cabinet, countertop, and mounting method; generic support details should not be treated as universal. Manor House Sinks’ installation guidance emphasizes interior measurements, plumbing and faucet clearance, and manufacturer-directed support for heavy models.
A larger sink is therefore a trade-off rather than an automatic upgrade. It can offer a larger washing area while also:
- Consuming more countertop area
- Reducing under-sink storage
- Limiting installation access
- Constraining plumbing routes
- Requiring a wider cabinet
- Increasing support or fabrication complexity
Obtain professional verification when cabinet components must be cut, a heavy sink needs reinforcement, or the bowl and drain cannot be reconciled with the plumbing. Depending on the issue, review may be needed from a cabinetmaker, countertop fabricator, plumber, sink installer, or several of those trades.
Choose the workflow that matches your project
The correct order of decisions depends on whether the cabinets and countertop already exist.
New kitchen
- Choose the general mounting style.
- Identify actual candidate sink models.
- Obtain each specification sheet and installation guide.
- Find the stated minimum cabinet size.
- Compare exact dimensions and support requirements.
- Assign the sink-base width in the cabinet plan.
- Plot the bowl, drain, disposal, waste arm, supply lines, and equipment.
- Have the designer or installer review the selected model before ordering.
Choosing the sink early prevents a late discovery that the planned cabinet is too narrow or that a wider base disrupts adjacent cabinets and appliances. Dean Cabinetry likewise recommends checking the minimum cabinet size and giving the sink model and specification sheet to the kitchen designer. See Dean Cabinetry’s sink-selection workflow.
A designer’s review supplements the manufacturer’s instructions; it does not replace them. The designer reconciles the sink with the layout, while the fabricator and installer confirm the cutout, support, and mounting details.
Replacement sink without a new countertop
Start with the fixed opening:
- Measure the existing sink’s overall dimensions.
- Measure the cutout width and front-to-back size.
- Record the corner radius.
- Measure rim coverage and faucet-hole locations.
- Measure the cabinet interior and clear opening.
- Plot plumbing and disposal locations.
- Find models compatible with both opening and cabinet.
- Compare their exact templates and installation instructions.
If the opening must be enlarged, a fabricator should determine whether the countertop material, seams, front and rear strips, faucet zone, and cabinet below permit the change.
Replacement sink with a new countertop
- Measure the cabinet exterior, usable interior, clear opening, depth, and height.
- Record rails, face-frame restrictions, and support locations.
- Plot all plumbing.
- Select the actual sink model.
- Verify its minimum cabinet requirement.
- Give the sink, specification sheet, installation guide, and approved template to the fabricator.
- Confirm the mounting reveal and faucet layout.
- Approve the cutout only after compatibility has been reviewed.
Never cut a countertop from a generic size chart or the sink’s advertised whole-number size.
Use the approved template for the selected model and intended mounting treatment. If the manufacturer requires the physical sink for templating or inspection, follow that instruction.
Farmhouse conversion
Before reusing a standard base, verify:
- Cabinet-front opening dimensions
- Face-frame or false-front changes
- Door interference
- Apron width and height
- Sink projection
- Support requirements
- Interior height
- Plumbing alignment
- Countertop modifications
- Installation sequence
Some cabinets can be modified for an approved model; others require replacement or specialized reconstruction.
Tight-fit or unusual installation
Stop for trade review before ordering if:
- The sink approaches the usable interior width
- Cabinet walls, rails, or frames would need cutting
- A heavy sink needs additional support
- The drain and waste line do not align
- A countertop seam is near the proposed cutout
- Faucet clearance is limited
- A corner or unusually shaped cabinet is involved
- Manufacturer documents conflict with a retailer chart
- The proposed method may affect warranty coverage
Resolve the discrepancy before placing a nonreturnable order or fabricating the countertop.
Final pre-purchase compatibility checklist
Use this checklist after identifying the actual cabinet and sink models.
Cabinet
- [ ] Confirm cabinet manufacturer and model.
- [ ] Record nominal exterior width.
- [ ] Measure usable interior width at the cabinet top.
- [ ] Measure the clear front opening.
- [ ] Record interior depth and height.
- [ ] Identify side panels, face-frame intrusion, rails, braces, and corner blocks.
- [ ] Mark existing and required support locations.
- [ ] Confirm that doors, hinges, and accessories remain clear.
Sink and manufacturer documents
- [ ] Record exact overall left-to-right width.
- [ ] Record exact front-to-back size and bowl depth.
- [ ] Locate the drain.
- [ ] Identify rim, flange, apron, ledges, and mounting method.
- [ ] Find the stated minimum cabinet size and verify how it is defined.
- [ ] Review the complete installation guide.
- [ ] Obtain the approved cutout template.
- [ ] Identify approved mounting hardware and support methods.
- [ ] Confirm countertop and installation-clearance requirements.
Countertop, faucet, and accessories
- [ ] Confirm cutout width, front-to-back size, and corner radius.
- [ ] Confirm the intended undermount reveal, if applicable.
- [ ] Check material remaining in front of and behind the cutout.
- [ ] Plot faucet and accessory holes.
- [ ] Check faucet movement against walls, backsplashes, windows, and shelves.
- [ ] Confirm that workstation accessories clear the faucet and surrounding surfaces.
- [ ] Do not authorize cutting from advertised sink dimensions alone.
Plumbing and modifications
- [ ] Plot the strainer, disposal, P-trap, and waste arm.
- [ ] Locate water lines and keep shutoff valves accessible.
- [ ] Include dishwasher, filtration, and other under-sink equipment.
- [ ] Check the complete assembly against bowl depth and drain position.
- [ ] Identify cabinet-front alterations, reinforcement, countertop work, and plumbing relocation before purchase.
- [ ] Have the appropriate trade resolve discrepancies before ordering or cutting.
The decision rule is straightforward: measure usable space, shortlist sinks by their stated minimum cabinet requirement, verify the exact specification sheet and approved template, and obtain installation approval before ordering or cutting.
Frequently asked questions
What is the most common kitchen sink cabinet size?
There is no independently established single most common width. Stock planning frequently centers on 30-, 33-, and 36-inch sink bases, while 27-inch bases are also commercially available. Claims that one width is the industry-wide default should be treated as general commercial guidance rather than a universal statistic.
For the cabinet box, about 34.5 inches high and 24 inches deep are common North American planning dimensions. Width should be selected around the actual sink model, cabinet construction, and layout.
What size sink fits a 30-inch cabinet?
Approximately 24 to 27 inches is a reasonable preliminary range for many conventional sinks in a 30-inch base. A 27-inch model sits near the upper end of common planning guidance, while a smaller sink may preserve more room for hardware and plumbing. HOROW’s planning guide gives the same 24- to 27-inch range for a 30-inch base.
The model-specific answer must come from the manufacturer’s minimum cabinet requirement and installation documents. A sink advertised as 30 inches wide should not be assumed to fit a 30-inch cabinet.
What cabinet size do I need for a 30-inch sink?
Many 30-inch sinks call for a 33- or 36-inch sink base. A 33-inch cabinet may satisfy the minimum for some models, while a 36-inch base generally offers more potential room for clips, supports, plumbing, and installation access.
Neither width is automatic. Confirm the minimum cabinet requirement and measure the actual interior and opening dimensions.
Can a 33-inch sink fit in a 33-inch cabinet?
Usually not as an ordinary, comfortable pairing. Equal advertised widths provide no nominal allowance for cabinet walls, a sink flange, supports, clips, or installer access. Some specially configured products or nonstandard installations may be possible, but they require explicit model-level approval. Ruvati’s general buying guidance similarly cautions against assuming that equal-width sink and cabinet labels provide adequate installation clearance. See Ruvati’s kitchen sink sizing considerations.
A safer initial assumption is that many 33-inch sinks will lead to consideration of a 36-inch base. If a manufacturer approves a smaller cabinet, verify its construction and the complete installation method.
Do farmhouse sinks require a special sink-base cabinet?
Many farmhouse or apron-front sinks require a compatible sink base or modifications to an existing cabinet. The apron may affect the face frame, false front, doors, countertop, and installation sequence, while the sink may need dedicated support.
Some retrofit models are designed for particular existing cabinet configurations, so a factory-made farmhouse base is not universally required. A standard base should nevertheless not be assumed reusable until the apron opening, door clearance, cabinet structure, support system, plumbing, and countertop modifications have been checked against the exact model. The Home Depot’s sink guide similarly notes that farmhouse sinks typically require a particular supporting base, while some models are designed for retrofit installations. Review the kitchen sink buying guide.
In practical terms, 34.5 inches high and 24 inches deep are useful sink-base box dimensions, while 27-, 30-, 33-, and 36-inch widths are common stock planning points. The decisive measurement is the selected sink’s minimum cabinet requirement reconciled with the cabinet’s actual interior, opening, hardware, supports, plumbing, and countertop cutout. Measure the usable space, verify the specification sheet and approved template, and obtain installer or fabricator approval before ordering or cutting.