
What Are Typical Base Cabinet Dimensions?
Door and drawer fronts may also project beyond the cabinet box, while knobs, pulls, appliance handles, and decorative panels can extend farther still.
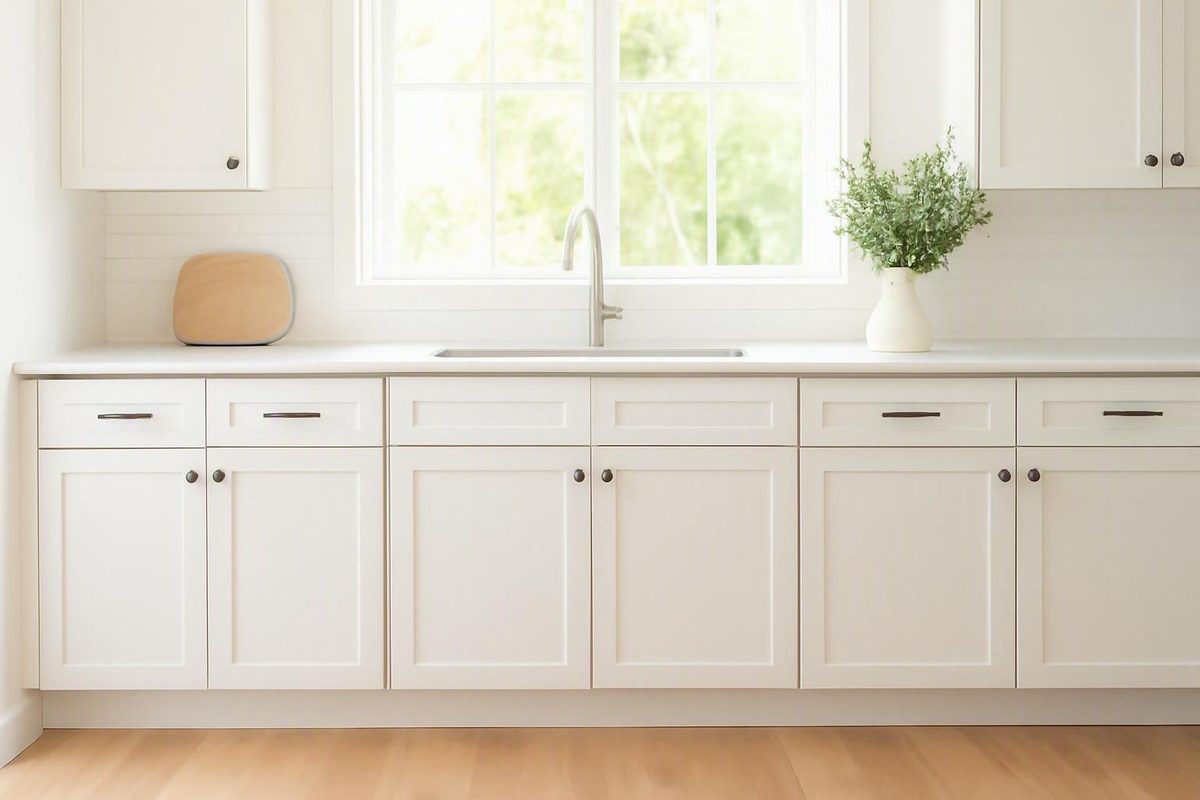
Kitchen base cabinet dimensions are often reduced to a few familiar figures, but those figures describe only part of a finished kitchen. Countertops change height and depth. Toe-kick construction changes how cabinet height is stated. Fillers, panels, appliances, corner units, utilities, and uneven walls can change whether a nominally correct cabinet actually fits.
Treat standard dimensions as North American planning conventions—not universal specifications, regulations, or code requirements. They are useful for developing a preliminary layout, but the final order must reflect the selected product line, appliance and sink specifications, approved drawings, and verified site conditions.
For dimensions covering wall and tall units as well as bases, see this overview of standard kitchen cabinet sizes.
Standard base cabinet dimensions at a glance
The table separates the nominal cabinet assembly from the completed installation.
| Dimension | Cabinet before countertop | Typical finished condition | What controls the final measurement |
|---|---|---|---|
| Height | About 34.5 inches | About 36 inches with a 1.5-inch top | Cabinet construction, leveling, countertop thickness, buildup, flooring, and project requirements |
| Depth | About 24 inches | Roughly 25 to 25.5 inches with a 1- to 1.5-inch front overhang | Countertop design, edge profile, doors, panels, and hardware |
| Width | Variable; commonly organized in 3-inch modules | Cabinet width plus fillers, panels, scribes, or trim | Current manufacturer catalog and layout conditions |
| Toe kick | Part of or below the installed assembly | Product-specific | Integrated base, separate platform, legs, finished toe board, and leveling system |
| Interior space | Less than nominal exterior dimensions | Product-specific | Box material, face frame, drawers, slides, shelves, plumbing, and hardware |
The familiar height calculation is:
34.5-inch cabinet + 1.5-inch countertop = approximately 36-inch work surface
The corresponding depth calculation is:
24-inch cabinet + 1- to 1.5-inch front overhang = approximately 25 to 25.5 inches overall
These figures—including the commonly cited 9- to 48-inch market range for widths—are planning conventions rather than guaranteed product dimensions. Countertop construction and the selected cabinet schedule determine the actual finished envelope. VIC Cabinet summarizes the 34.5-inch height, 24-inch depth, 1- to 1.5-inch overhang, and modular width conventions.
Neither equation is a promise. A thin top, built-up edge, substrate, support layer, unusual edge treatment, or nonstandard installation can change the result. Door and drawer fronts may also project beyond the cabinet box, while knobs, pulls, appliance handles, and decorative panels can extend farther still.
Width varies more than height or depth. Many stock systems use 3-inch modules, but an individual collection may begin at a different width, stop earlier, or omit particular increments. A width that works mathematically on a 3-inch grid is not necessarily available in the selected door style, cabinet function, or construction type.
Before ordering, reconcile four sets of information:
- The current cabinet schedule for the selected collection
- Installation instructions for the actual appliances, sink, and accessories
- Approved cabinet, countertop, and utility plans
- Field measurements taken after relevant site conditions are established
Those sources—not a general dimensional guide—must control the purchase.
Why base cabinet height may be listed as 30, 34.5, or 36 inches
The three heights usually describe different layers or stages of construction rather than competing standards.
- Approximately 30 inches may describe the cabinet body alone.
- Approximately 34 to 34.5 inches commonly describes the installed cabinet assembly before the countertop.
- Approximately 36 inches commonly describes the finished work surface after the countertop is installed.
One construction method places a cabinet body around 30 inches high on a separate toe-kick base around 4 inches high. Once the countertop is added, the work surface can still finish near 36 inches. Erin Zubot Design illustrates this body-plus-toe-kick method and its relationship to finished counter height.
Many cabinet schedules instead list 34.5 inches as the cabinet height. In that case, the figure commonly measures from the installed bottom of the assembly to the top of the cabinet box. The published dimension may already account for an attached base, integral toe-kick structure, or another support system.
Do not automatically calculate:
34.5-inch listed cabinet + 4-inch toe kick + countertop
That may count the toe-kick zone twice. Add a separate platform, leg, or toe-kick height only when the manufacturer’s drawing states that the published cabinet height excludes it.
Toe-kick dimensions also depend on construction. Available guidance includes examples around 3 to 4 inches high with approximately 3 to 4 inches of recess, but those values are not universal. Re-New Cabinets provides one example of a roughly 3-inch-high toe kick with a 3.5- to 4-inch recess.
Even when the installed cabinet assembly is 34.5 inches high, the top does not necessarily add exactly 1.5 inches. Finished work-surface height can change because of:
- Actual countertop material and thickness
- Plywood buildup, substrate, or underlayment
- Built-up or mitered edges
- Cabinet shimming and leveling
- Finished flooring installed before or after the cabinets
- Sloped or uneven floors
- Raised or lowered work zones
- User-specific needs
- Accessibility or other project requirements
“Approximately 36 inches” is therefore a familiar conventional result, not a universally suitable work height or automatic indication of compliance.
How to measure and read a base cabinet specification
Cabinet dimensions are commonly written in this order:
Width × height × depth
For example:
W36 × H34.5 × D24
This notation describes a cabinet that is:
- 36 inches wide across the front
- 34.5 inches high from the installed bottom to the top of the cabinet, excluding the countertop
- 24 inches deep from back to front at the manufacturer’s stated reference point
The notation is widely used, but product codes and abbreviations can differ. Elite Home Remodeling decodes W36 × H34.5 × D24 in width-height-depth order.
Width is measured side to side across the cabinet front. For an ordinary rectangular base, this is usually the nominal dimension used when totaling cabinets in a run. It does not automatically include a loose filler, scribe strip, decorative end panel, applied skin, or adjacent appliance opening.
Height is measured from the bottom of the installed cabinet assembly to the top of its box, excluding the countertop. If a cabinet uses detachable legs, a separate platform, or an independent toe-kick system, confirm whether those components are included in the scheduled height.
Depth is the back-to-front exterior measurement to the box or face frame, depending on the manufacturer’s convention. Doors, drawer fronts, knobs, pulls, appliance handles, and countertop edges should be treated as additional projections unless the drawing explicitly includes them.
A publication-ready dimensional drawing should separate elevation and plan views rather than combining them.
Elevation-view diagram specification
| Label | What the drawing should show |
|---|---|
| Cabinet-box or assembly height | Installed bottom to top of box |
| Toe-kick area | Height, recess, and whether it is integral or separate |
| Countertop thickness | Top of cabinet to finished work surface |
| Finished work-surface height | Floor to top of countertop |
| Face frame or door | Its position relative to the cabinet box |
Caption and text equivalent: Side elevation of a base cabinet showing the floor, recessed toe-kick zone, cabinet assembly, face frame or door, countertop thickness, and total finished work-surface height.
Plan-view diagram specification
| Label | What the drawing should show |
|---|---|
| Cabinet width | Side-to-side dimension across the front |
| Cabinet-box depth | Back wall to the stated front reference |
| Door and hardware projection | Additional depth beyond the box |
| Countertop overhang | Distance the top projects beyond the cabinet front |
| Finished envelope | Farthest fixed projection into the room |
Caption and text equivalent: Top view of a base cabinet showing width, box depth, door and hardware projection, countertop overhang, and the completed front-to-back envelope.
Nominal exterior dimensions do not establish usable interior space. Two cabinets with the same exterior width can have different openings because one is face-framed and the other frameless. Cabinet sides, center stiles, drawer boxes, slides, hinges, shelves, plumbing, disposals, waste bins, and internal accessories all consume space.
That distinction is especially important when fitting a sink, pull-out, drawer organizer, or appliance. Do not subtract a generic amount from the exterior dimensions and treat the remainder as universal interior capacity. Use the product drawing for the actual opening, interior box, and hardware clearances.
Base cabinet widths and the 3-inch module
Stock cabinetry is commonly planned as a modular system. Many collections organize ordinary widths in 3-inch increments, allowing designers to combine repeatable components into a run.
The broader market is often described as extending from approximately 9 to 48 inches, but published guides and actual product lines do not agree on one universal range. Some begin at 6, 9, or 12 inches; some stop at 42, 46, or 48 inches. The useful conclusion is not that one range is correct, but that the current schedule for the selected collection must settle availability.
Irregular values sometimes found in online tables should not be generalized into industry standards. They may be product-specific, copied incorrectly, or based on a detail that is missing from the summary.
Consider this hypothetical run:
| Component | Illustrative nominal width |
|---|---|
| Drawer base | 18 inches |
| Sink base | 36 inches |
| Ordinary door base | 24 inches |
| Nominal cabinet total | 78 inches |
The arithmetic is simple:
18 + 36 + 24 = 78 inches of nominal cabinets
A 78-inch wall, however, is not automatically sufficient. The layout may also need:
- A filler beside a wall or corner
- Scribe allowance for an uneven wall
- A finished end or appliance panel
- Decorative furniture panels or legs
- Clearance beside an appliance
- Space for a door or drawer near a return
- Trim around a window or doorway
- Clearance for projecting hardware
- Installation tolerance
Published catalogs may list 6- or 9-inch filler pieces, but these are catalog examples rather than a universal filler schedule. Fillers are often cut to the installed width required by the room. CabinetCorp’s guide illustrates the 3-inch module, a broader 9- to 48-inch range, and 6- and 9-inch filler examples while also showing why individual schedules must be checked.
The module makes planning efficient. Fillers, scribes, panels, and tolerances make the modular run fit the actual building.
Choosing dimensions by cabinet function
Ordinary door bases, sink bases, drawer bases, pull-outs, and cooktop cabinets can share the same exterior height and depth system while requiring very different interiors.
A sink base may have false drawer fronts, modified rails, an open interior, or doors without shelves. Exterior width alone does not prove that a sink will fit. A 30-inch sink base is a common starting example for some single-basin sinks, while 33- to 36-inch cabinets are frequently considered for larger or double-basin models. Builders Surplus gives similar sink-base examples while noting that dimensions vary by product.
Before confirming a sink cabinet, check:
- The sink manufacturer’s minimum cabinet size
- The complete sink template
- Overall rim or flange dimensions
- Bowl width, depth, and front-to-back position
- Top-mount, undermount, apron-front, or other mounting method
- Countertop rail and cabinet-side interference
- Faucet and accessory-hole placement
- Backsplash and window-sill clearance
- Supply and drain locations
- Disposal dimensions
- Water-treatment equipment
- Pull-out waste or storage hardware
- Cabinet modifications authorized by the manufacturer
A sink marketed as “30 inches” may be describing overall length, bowl size, or a model category rather than the minimum cabinet required.
A drawer base must be selected around its actual drawer-box dimensions and hardware. Nominal exterior width includes the cabinet sides and may include a face frame. Slides, installation clearances, center stiles, drawer construction, and front overlays reduce usable width. An organizer made for one cabinet line may not fit another cabinet with the same nominal width.
The same principle applies to narrow pull-outs. Spice racks, tray dividers, waste systems, and bottle pull-outs may require a specific opening width, interior depth, door attachment method, and hardware clearance. Confirm compatibility with both the cabinet and the accessory.
A cooktop or appliance base is governed by the selected appliance. Follow its installation instructions for:
- Cabinet and countertop cutouts
- Required structural support
- Clearances from surrounding materials
- Ventilation
- Electrical or gas connections
- Access to shutoffs and junction boxes
- Drawer or oven interference below
- Spacing from adjacent surfaces
Nominal cabinet width identifies the outside size of a component. It does not confirm compatibility with a sink, organizer, cooktop, or other appliance.
Corner, shallow, and island bases need separate rules
Specialty cabinets should not be interpreted as ordinary rectangular bases. Their product names and dimensions may refer to footprints, wall spans, face widths, openings, or required voids.
Lazy Susan corner bases commonly appear in approximately 33- or 36-inch footprint or cabinet-width examples. That does not mean they have a simple rectangular depth of 33 or 36 inches. Their shape occupies portions of two intersecting walls, and the doors may be diagonal, hinged together, or otherwise specialized.
Blind-corner bases are even easier to misread. One published example has a room-facing section around 36 inches while requiring approximately 42 to 48 inches from the back corner to the facing edge. Fabuwood distinguishes the room-facing portion of a blind-corner cabinet from its longer required wall span.
A corner-cabinet footprint drawing should label each reference independently:
| Required label | Meaning |
|---|---|
| Wall A dimension | Cabinet or required span along the first wall |
| Wall B dimension | Cabinet or required span along the intersecting wall |
| Overall footprint | Full area occupied by the cabinet and any void |
| Room-facing width | Visible section facing into the room |
| Corner void | Concealed space required behind or beside the unit |
| Door opening | Clear opening available for access |
| Filler or panel | Additional component needed at an exposed or adjacent edge |
| Operating clearance | Space required for neighboring doors, drawers, and handles |
Caption and text equivalent: Plan view of a corner base at two intersecting walls, identifying the dimensions along both walls, the concealed corner void, overall footprint, room-facing width, door opening, fillers, and adjacent operating clearances.
A “33-inch corner cabinet” might describe the footprint along each wall, a nominal width, or a product-family label. It should not automatically be entered as ordinary cabinet depth.
Shallow bases form another distinct category. Product lines may offer depths such as 15, 18, or 21 inches for constrained rooms, secondary storage, narrow islands, or other specialized uses. These are project-specific alternatives rather than equivalent replacements for a conventional 24-inch base. VIC Cabinet lists 15-, 18-, and 21-inch depths as specialized options.
A shallow base consumes less floor space, but it also provides less storage depth and a shallower work surface. It may be incompatible with a sink, appliance, deep drawer system, pull-out accessory, or standard countertop arrangement.
Island bases require project-specific design. Published island widths and heights are examples rather than standards. Completed size depends on:
- The number and orientation of cabinets
- Whether cabinets are installed back to back
- Finished backs and end panels
- Structural supports
- Countertop thickness and overhang
- Seating arrangement
- Sink or appliance requirements
- Electrical and plumbing routes
- Circulation around every side
Measure an island as a finished assembly—not merely as the sum of its cabinet boxes.
From cabinet dimensions to a workable kitchen layout
Nominal cabinet sizes show whether components can be arranged mathematically. They do not show whether people can move through the kitchen, open appliances, use work surfaces, or operate adjacent cabinets at the same time.
A walkway is primarily a passage for travel. A work aisle lies between active kitchen surfaces or work centers. Because a work aisle accommodates cooking activity and interaction among users, its planning target is commonly larger.
Frequently cited planning guidance uses approximately:
- 36 inches for a walkway
- 42 inches for a one-cook work aisle
- 48 inches for a multiple-cook work aisle
These are planning recommendations, not universal legal minimums. JWQ Cabinetry attributes the 36-, 42-, and 48-inch figures to kitchen-planning guidance and distinguishes them from project-specific requirements.
Measure clearances between the finished projecting surfaces that constrain movement. Depending on the layout, that may mean measuring from:
- Countertop edge to countertop edge
- Countertop edge to an appliance handle
- Cabinet hardware to a wall or projecting trim
- Island overhang to an opposing counter
- Open appliance door to the nearest obstruction
- Seating zone to the surface behind it
A cabinet box that is 24 inches deep can project farther after the door and countertop are installed. Hardware may extend farther again. A refrigerator handle, open dishwasher door, or projecting range handle can become the limiting condition even when the closed cabinet-to-cabinet distance appears adequate.
The layout must also allow appliances to operate. Verify the current installation documents for the exact dishwasher, range, cooktop, oven, refrigerator, microwave, and ventilation equipment. Record more than nominal width: doors, handles, hinges, ventilation space, side and rear clearances, trim kits, utility access, and installation cutouts can all affect adjacent cabinetry.
Pay particular attention to cabinets near returns. A drawer beside a projecting wall may need a filler so its front and handle clear the wall. A cabinet door near a range may conflict with the oven handle. A refrigerator installed beside a wall may need enough hinge-side space for its door to open to the angle required for internal drawers or bins.
Conventional dimensions may not suit every user. They can also be inappropriate for regulated projects or spaces with specific accessibility criteria. Check the applicable primary requirements, approved plans, and user needs directly. Neither a familiar finished counter height nor a commonly cited aisle dimension should be described as automatically compliant.
Pre-order measurement and verification checklist
Use this checklist when developing the layout and again immediately before releasing the cabinet order.
-
Create an as-built room sketch. Draw every wall, return, recess, opening, and projection. Give each wall a unique label so field dimensions can be matched to the plan.
-
Measure each wall at several heights. Record dimensions near the floor, around countertop height, and higher on the wall. Differences can reveal walls that bow, taper, or meet at an angle.
-
Check every corner. Do not assume corners are square. Note irregular inside and outside corners, especially where cabinets, countertops, fillers, or panels terminate.
-
Check the floor for level. Locate high and low points along each run. The floor’s high point can influence cabinet leveling and finished countertop elevation.
-
Check walls for plumb and flatness. Leaning or bowed walls can change scribe requirements, cabinet alignment, countertop templating, and the appearance of end panels.
-
Record doors and windows. Include finished openings, casing, sill projection, door swing, trim blocks, and the distance from each opening to the nearest corner.
-
Mark fixed features. Locate baseboards, switches, outlets, vents, radiators, columns, beams, access panels, thermostats, and other elements that cannot easily be moved.
-
Locate all utilities. Record water supplies, drains, electrical connections, gas lines, ductwork, exhaust routes, and shutoffs. Measure from established reference points.
-
Document each appliance by model number. Retain the current installation instructions. Record overall dimensions, cutout requirements, side and rear clearances, handle projection, door swing, ventilation, trim, and utility locations.
-
Check appliance operation. Draw refrigerator, dishwasher, and oven doors in their open positions. Confirm they do not block necessary circulation or collide with nearby doors, drawers, walls, or handles.
-
Confirm the sink specification. Record overall and bowl dimensions, minimum cabinet size, template, mounting method, faucet position, disposal requirements, and plumbing path.
-
Verify cabinet interiors where fit matters. Obtain opening and interior dimensions for drawers, pull-outs, waste systems, sink bases, appliance cabinets, and accessory-equipped units.
-
Add non-cabinet components to every run. Include fillers, scribes, finished panels, appliance panels, decorative legs, trim, countertop overhangs, and operating clearances.
-
Check corner cabinets by footprint. Verify both wall dimensions, room-facing width, corner void, door opening, adjacent fillers, and clearance for neighboring drawers and hardware.
-
Confirm countertop construction. Record actual material thickness, buildup, substrate, edge detail, backsplash thickness, and front and end overhangs.
-
Reconcile nominal and finished dimensions. Compare the cabinet-box layout with the completed envelope, including doors, pulls, countertop edges, appliance handles, and seating overhangs.
-
Compare field dimensions with the current schedule. Confirm that every cabinet code, width, hinge direction, finished side, modification, panel, and accessory exists in the selected collection.
-
Review the approved drawings before release. Resolve discrepancies among the field sketch, cabinet plan, appliance documents, sink template, countertop design, and utility plan.
CabinetCorp’s measuring guidance similarly emphasizes recording doors, windows, utilities, switches, and fixed fixtures before ordering. Its planning guide identifies these site conditions as essential measurement inputs.
The priority rule is straightforward: specific product documents, current appliance instructions, verified site dimensions, approved project drawings, and applicable governing requirements override generalized dimension guides.
Frequently asked questions
What is the standard height of a base cabinet without a countertop?
A typical North American stock base-cabinet assembly is about 34.5 inches high before the countertop. With a 1.5-inch top, that commonly results in a finished work surface around 36 inches. Mr. Handyman distinguishes the 34.5-inch cabinet height from the approximately 36-inch countertop-inclusive height.
Check whether the cabinet line includes its toe-kick structure, legs, or platform in the published height. Do not add a separate toe-kick dimension unless the product drawing directs you to do so.
How deep is a base cabinet after countertop overhang is included?
A conventional cabinet box is about 24 inches deep. After the countertop is installed, the completed depth is commonly around 25 to 26 inches, depending on the overhang and edge construction. Builders Surplus lists a 24-inch cabinet-box depth and a finished depth of approximately 25 to 26 inches.
That estimate does not include every possible projection. Doors, drawer fronts, knobs, pulls, appliance handles, decorative panels, and unusual countertop edges can extend farther.
Do all base cabinets come in widths from 9 to 48 inches?
No. The 9- to 48-inch range is an approximate description of the broader stock-cabinet market, not a promise that every manufacturer offers every size. CabinetCorp presents that broader range while its own selective table demonstrates why actual schedules must be checked.
Many lines use 3-inch modules, but they may begin or end at different sizes, omit increments, or restrict a width to a particular function. Construction type, collection, door style, and accessory configuration can also affect availability.
What size base cabinet is needed for a kitchen sink?
A 30-inch sink base is a common starting example for some single-basin sinks, while 33- to 36-inch cabinets are often considered for larger or double-basin models. These are planning examples, not fit guarantees. Erin Zubot Design similarly describes 30 inches as a lower-end example and 36 inches as a common sink-base width.
The sink manufacturer’s minimum cabinet size controls, interpreted together with the template, mounting method, bowl dimensions, faucet placement, countertop construction, disposal, plumbing, and actual cabinet opening. Apron-front and unusually deep sinks may require purpose-built or manufacturer-approved modified cabinets.
Can base cabinets be shallower than 24 inches?
Yes. Some product lines offer bases shallower than the conventional 24-inch depth for tight rooms, secondary storage, or narrow islands. Re-New Cabinets, for example, discusses a specialized 12-inch-deep option for constrained spaces.
The tradeoff is reduced storage depth and less countertop workspace. A shallow base may also be unsuitable for standard sinks, appliances, deep drawers, or pull-out accessories.
For conventional North American planning, the dependable starting point remains a base-cabinet assembly about 34.5 inches high and 24 inches deep before the countertop. Width, finished dimensions, and actual fit are product- and project-specific.
Release the final order only after matching verified field measurements to the current cabinet schedule, countertop design, appliance and sink instructions, approved plans, and applicable requirements.