
Toe Kick Height Comes From the Full Cabinet Stack
Manufacturer guidance presents 3.5 to 4 inches as a typical toe kick range rather than a mandatory dimension for every cabinet.
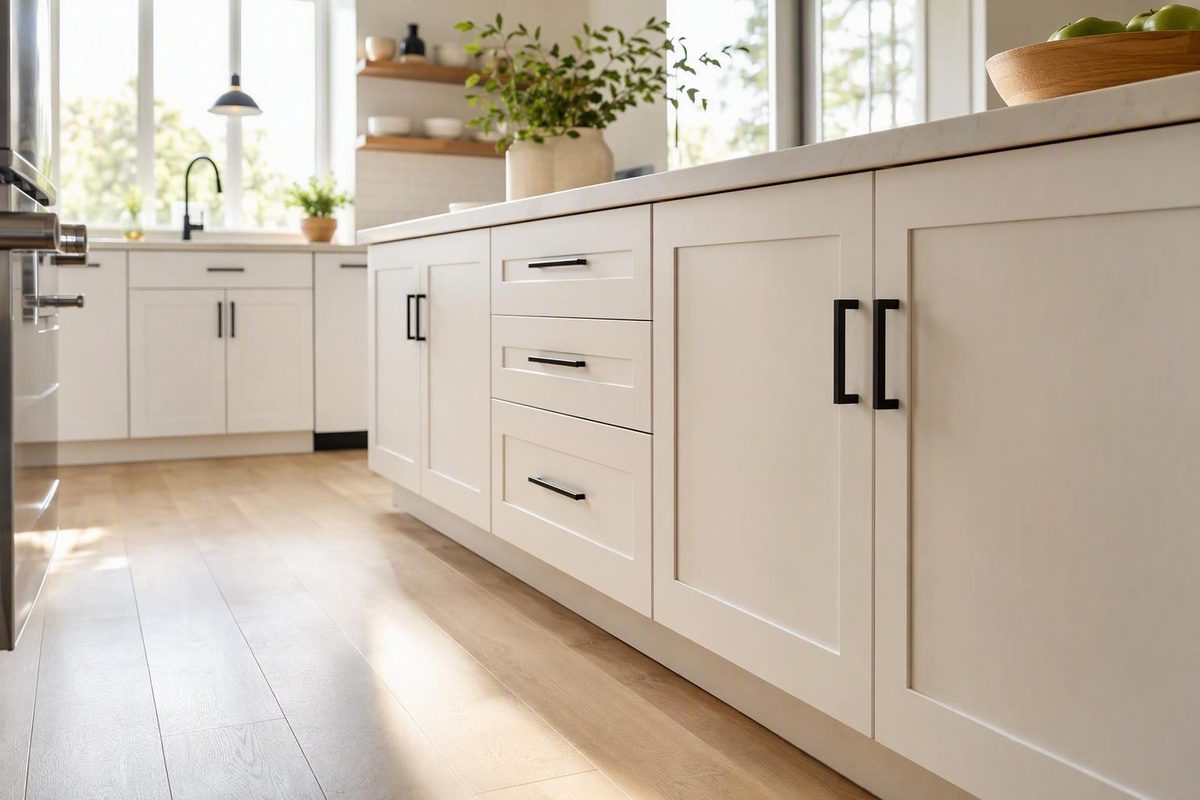
The short answer: plan around 3.5 to 4 inches, then verify the cabinet system
For a conventional residential kitchen, begin planning with a toe kick about 3 to 4 inches high. Within that reported range, 3.5 to 4 inches is a practical preliminary assumption. Four inches appears frequently in cabinet guidance, but it is not a universal industry standard or a dimension that applies to every cabinet line. Published guidance also describes these conventions as customary rather than legally mandated. Manufacturer and design guidance commonly reports dimensions in this range while allowing system-specific variation.
A recess depth of approximately 3 inches is also commonly reported. Published examples extend from roughly 2 to 4 inches, partly because sources use different cabinet systems and do not always measure from the same front surface. ALLURE, for example, describes a typical setback of about 2 to 3 inches, while Fabuwood reports approximately 3 to 4 inches. ALLURE’s manufacturer guidance presents the smaller range as a planning convention rather than a universal requirement.
The reported practices can be summarized this way:
| Reported toe kick height | How to interpret it | Supporting context |
|---|---|---|
| 3 inches | Manufacturer-reported convention, not a universal standard | Fabuwood describes 3 inches as a common height and allows taller custom dimensions. |
| 3.5 inches | Residential planning convention | Some retailer and design guidance pairs a 3.5-inch height with an approximately 3-inch recess. |
| 4 inches | Frequently reported planning starting point | Manufacturer guidance, cabinetmaking practice, and particular product systems use or begin around this dimension. |
| 4 to 4.5 inches | Product or design practice | This range can result from a particular cabinet stack, supplied trim, platform, leveling method, or design choice. |
These rows summarize reported practices rather than market-wide prevalence. Fabuwood supports the 3-inch and up-to-4.5-inch examples, while one independent installation account describes 4 to 4.5 inches in the author’s cabinet system. Fabuwood’s cabinet guide illustrates how one manufacturer’s reported dimensions can span several heights and depths.
Published numbers differ for several reasons:
- Separate-base construction versus a notch built into the cabinet
- Adjustable legs versus a fixed platform
- Stock, custom, residential, or commercial cabinet systems
- Different cabinet-box or cabinet-side heights
- Finished-floor thickness and uneven site conditions
- Overlay doors and drawers that project beyond the box
- Measurement from the box, cabinet face, overlay front, or countertop edge
- Manufacturer-specific plinth and trim dimensions
A 3-inch recess is therefore useful for preliminary planning only when its reference plane is identified. A measurement from the cabinet face to the recessed skin is not interchangeable with a measurement from an overlay drawer front or countertop edge.
Controlling rule: The current drawing or specification for the selected cabinet system takes precedence over every generic range in this article.
Use common dimensions to begin a layout, estimate proportions, or discuss options. Do not use them by themselves to release cabinets, plinth panels, countertops, or appliances for production.
What a toe kick is—and exactly where to measure it
A toe kick is the recessed space at the bottom front of a base cabinet. It allows a standing user’s feet to extend beneath the cabinet face rather than meeting a flush vertical surface at floor level.
Several components occupy this area:
- The usable recess is the open foot space shown in a side section.
- The structural base supports the cabinet box. It may be a platform, extended cabinet sides, or adjustable legs.
- The recessed skin, finish panel, or plinth covers the front of the structural base.
- The cabinet box is the main cabinet body.
- The cabinet face or face frame establishes the front reference plane above the recess.
- An overlay door or drawer front may project beyond that plane.
Toe kick height is the vertical distance from the finished floor to the point where the cabinet face begins.
Recess depth is the horizontal distance from the cabinet-face plane to the front surface of the recessed base or finished skin. These measurement definitions and the requirement to use the finished floor are set out in JWQ Cabinetry’s technical explanation. See the supplier’s illustrated definition of toe-space height and recess depth.
The planes are separate in this simplified side view:
                                  COUNTERTOP EDGE
                                         │
                  ┌───────────────────────┤
                  │      COUNTERTOP       │
                  └───────────────────┬───┘
                                      │<-- countertop overhang -->
                                      │
OVERLAY DOOR / DRAWER FRONT ────────> │
                                      │
CABINET FACE / FACE FRAME ────────>   │
                                  ┌───┤
CABINET BOX FRONT ───────────────>│   │
                                  │   │
                                  │   │
                                  │   │
                                  └───┤
                                      │
RECESSED SKIN / PLINTH ─────────>     │
                                  ┌───┘
FINISHED FLOOR ───────────────────┴──────────────────

                                  ↑
                                  │ Toe kick height
                                  │
                                  ↓
                         Finished floor to the
                         start of cabinet face

                         <------ Recess depth ------>
                         Recessed skin to the
                         cabinet-face plane
In a real cabinet section, the box front and face-frame plane may coincide or may be offset. An overlay drawer front can project farther into the room. The countertop edge normally projects farther still.
Consequently, drawings should label these dimensions separately:
- Recessed skin to cabinet-face plane
- Recessed skin to overlay door or drawer front
- Recessed skin to countertop edge
- Countertop overhang beyond the cabinet front
Countertop overhang can create additional effective foot room above the recess, but it is not part of the cabinet recess measurement. Likewise, a depth measured from an overlay front is not the same dimension as one measured from the cabinet box.
Do not measure installed toe kick height from the subfloor when tile, wood, resilient flooring, underlayment, or another finish will raise the walking surface. The useful visible measurement begins at the final finished-floor elevation.
Calculate toe kick height from the complete cabinet stack
Toe kick height is best treated as one part of the complete vertical assembly rather than as an isolated number.
For project planning, use:
Toe kick height = target finished counter height − cabinet-box height − countertop and support thickness
This is a stack-up calculation, not an industry standard. It is valid only when the dimensions use compatible reference points and the selected cabinet is assembled in that sequence. Manufacturer guidance similarly recommends calculating the complete stack from the finished floor through the toe kick, cabinet box, supports, and countertop. ALLURE explains this complete-stack planning method.
“Countertop and support thickness” may include more than the visible finish. Depending on the assembly, it can include a substrate, buildup, under-counter support, or another layer between the cabinet box and finished surface.
Hypothetical example: a 4-inch toe kick zone
Assume a project has:
- Target finished counter height: 36 inches
- Cabinet-box height: 30.5 inches
- Countertop and support assembly: 1.5 inches
The calculation is:
36 − 30.5 − 1.5 = 4 inches
That leaves a 4-inch toe kick zone. These dimensions are hypothetical and demonstrate the arithmetic; they do not establish that the component sizes suit a particular cabinet or countertop system.
Some cabinet systems treat cabinet-side height and toe kick height as separate configuration inputs, then calculate the total cabinet height. Cabinotch follows that approach, illustrating why “cabinet height” must be defined carefully: it may mean the box, the side, or the complete assembly. Cabinotch explains its separate cabinet-side and toe-kick inputs.
Hypothetical comparison: changing the toe kick while holding the counter steady
Assume the finished counter must remain at 36 inches and the countertop assembly remains 1.5 inches thick:
| Toe kick zone | Cabinet-box height | Finished counter height |
|---|---|---|
| 3.5 inches | 31 inches | 36 inches |
| 4 inches | 30.5 inches | 36 inches |
| 4.5 inches | 30 inches | 36 inches |
In this simplified comparison, increasing the toe kick requires reducing the cabinet-box height. The total stays unchanged.
If the 30.5-inch box instead remains fixed and the toe kick rises from 4 to 4.5 inches, the finished counter rises from 36 to 36.5 inches unless the countertop assembly or another component becomes thinner. That may be intentional, but it should appear in the approved project documents rather than being discovered during installation.
This stack-up calculation can be used alongside Cabinet Data’s broader guide to kitchen cabinet sizes and layout dimensions. That article provides context for the overall cabinet plan; it is not evidence for a particular toe kick dimension.
Account for finished flooring and uneven floors
The meaningful installed toe kick height begins at the finished floor, not automatically at the subfloor or cabinet platform.
If cabinets are positioned before the flooring in front of them reaches its final elevation, the exposed recess becomes shorter when that flooring is added.
Hypothetical floor-buildup example
Assume:
- Nominal opening above the subfloor: 4 inches
- Later floor buildup in front of the cabinets: 0.75 inch
The visibly exposed opening becomes:
4 − 0.75 = 3.25 inches
The result is a 3.25-inch visible toe kick above the new finished floor.
This arithmetic illustrates the effect of floor buildup. It is not a recommendation that flooring should always be installed before cabinets, always be installed afterward, or always continue beneath them. Sequencing depends on the flooring product, cabinet construction, appliance requirements, project details, and approved installation method.
Floor buildup also affects the opening beneath the countertop. An under-counter appliance that could be inserted before the floor was finished may become difficult to install or remove afterward. Retailer guidance specifically warns that flooring thickness can affect toe kick appearance and appliance alignment. Kitchen Cabinet Kings discusses the interaction among flooring, cabinet height, and under-counter appliances.
Uneven floors create a related problem. Cabinets generally must be leveled even when the floor is not, so the exposed toe kick may measure differently at opposite ends of a run. Legs or shims establish the level cabinet elevation; the visible plinth can then be cut or scribed to follow the final floor line.
Do not rely on one measurement for a long cabinet run. Record elevations at:
- Both ends of the run
- Corners
- Appliance openings
- Flooring transitions
- Noticeable high and low points
- Islands and peninsulas
Floor and toe kick measurement worksheet
| Field | Measurement or note |
|---|---|
| Subfloor elevation or project datum | |
| Finished-floor material | |
| Underlayment, membrane, adhesive, or other buildup | |
| Total finished-floor thickness | |
| Highest floor point under or in front of cabinet run | |
| Lowest floor point | |
| Cabinet leveling allowance | |
| Planned nominal toe kick height | |
| Resulting visible toe kick at left end | |
| Resulting visible toe kick at center or appliance break | |
| Resulting visible toe kick at right end | |
| Flooring beneath cabinets, in front only, or project-specific transition | |
| Appliance installation and removal path | |
| Plinth cutting or scribing allowance |
Document the actual floor assembly and appliance path instead of relying on a general rule about whether flooring “should” run beneath cabinets. The correct detail is the one coordinated for the selected materials, products, and installation method.
Coordinate the toe kick with appliances, levelers, and cabinet fronts
Toe kick height cannot safely be changed as an isolated detail. It participates in the complete cabinet, countertop, floor, front, and appliance assembly.
Before changing it, check:
- Dishwasher opening measured from the finished floor
- Other under-counter appliance openings
- Range height and alignment with adjacent counters
- Refrigerator panels or adjacent base alignment where applicable
- Adjustable-leg minimum and maximum range
- Cabinet-box or cabinet-side height
- Door and drawer position
- Overlay-front thickness
- Final countertop elevation
- Countertop buildup and support
- Finished-floor buildup
- Appliance installation and future removal path
A floor added in front of the cabinets can reduce appliance clearance from below. A taller base or toe kick can raise the countertop from above. Either change can affect whether a dishwasher fits and whether it can later be removed without disturbing the floor, cabinet, or countertop.
Do not substitute a generic appliance opening for the selected model’s instructions. Use the current installation manual for every dishwasher, beverage center, under-counter refrigerator, ice maker, range, or other affected appliance.
Levelers must also be checked by product. Cabinotch states that the legs in its referenced leveling system have a 5-inch maximum height. That limit applies only to the identified Cabinotch system; it is not a general maximum toe kick height and cannot be assigned to other leveling products. Verify the product-specific limit in Cabinotch’s current FAQ.
The most useful approval document is a dimensioned side section showing:
- Finished-floor elevation
- Cabinet support, platform, or leg
- Recessed skin
- Toe kick height and depth
- Cabinet-box height
- Cabinet face and overlay front
- Countertop assembly
- Finished counter height
- Appliance opening
- Appliance adjustment range
- Installation and removal path
Prepare separate sections wherever the condition changes. An appliance break, exposed end, island return, tall-cabinet transition, decorative panel, or accessible work area may require a different base treatment.
Manufacturer drawings, approved cabinet schedules, current appliance manuals, verified field measurements, and project requirements override generic guidance because they describe the products and conditions that will actually be installed.
When a custom toe kick makes sense
Custom sizing may be appropriate when a conventional dimension does not produce the intended complete assembly. Possible reasons include:
- A specified finished counter height
- User preference or stance
- Larger footwear
- Thick floor buildup
- Extra adjustment over an uneven floor
- A particular cabinet-box design
- Product-specific legs, platforms, or plinths
- An island or peninsula with furniture-style ends
- A transition between cabinet systems
Treat comfort recommendations as practical preferences, not medical or scientifically established ergonomic requirements. If a user wants more foot room, test the proposed height and depth against that person’s normal stance where practical.
A taller toe kick has a direct dimensional tradeoff. If the total cabinet height remains fixed, additional height below generally leaves less vertical height for the cabinet box. If the box remains fixed, the countertop rises unless another layer becomes thinner. Neither result is inherently wrong, but the intended outcome must be selected and documented.
Recessed versus flush bases
A recessed toe kick places the visible base or plinth behind the cabinet face. It creates a defined foot recess and can provide some fitting tolerance where the floor line varies.
A flush furniture-style base brings the base closer to the cabinet face or removes the conventional recess. It can create a continuous furniture appearance on an island, peninsula, decorative end, or selected cabinet run, but it is not dimensionally equivalent to a recessed base.
Flush material may require closer fitting where floors are uneven because variations are visible at the front plane. Scribing can be used to follow the floor. This is an installation consideration, not a universal claim that flush bases are always harder, more expensive, or less comfortable. A firsthand renovation account shows recessed and flush treatments requiring different framing and fitting methods in the same kitchen. Erin Zubot Design documents both base configurations in one installation.
Before producing a custom base:
- Draw a complete, full-size or fully dimensioned side section.
- Identify the finished floor and every vertical component.
- Show the cabinet box, face, overlay front, and countertop edge separately.
- Test the standing position where the recess matters.
- Check appliance, door, and drawer movements.
- Confirm how the plinth will be fitted, attached, removed, and serviced.
- Review transitions among recessed, flush, and decorative conditions.
Stock residential cabinets, custom millwork, architectural casework, commercial installations, and bathroom cabinetry can use different conventions. A successful dimension in one context should not automatically be generalized to another.
Do not confuse a conventional toe kick with accessible clearance
An ordinary standing-user toe kick and accessible knee or toe clearance are different design conditions.
A conventional toe kick is a shallow recess below a cabinet face. An accessible work surface may require coordinated space beneath or around the element, along with an appropriate work-surface height, approach, floor area, route, and surrounding clearances. Slightly increasing a conventional recess does not by itself create an accessible workstation or establish compliance. JWQ Cabinetry’s technical guide makes this distinction and directs applicable projects to the U.S. Access Board’s Section 306 guidance. Review the accessibility distinction and official-resource direction.
Conventional residential planning convention
- Often begins around 3.5 to 4 inches high
- Frequently uses an approximately 3-inch recess
- Serves as a preliminary standing-user cabinet detail
- Must be verified against the selected cabinet system
Project-specific accessible clearance
- Is determined from current primary accessibility standards
- Depends on the complete work surface and approach
- Must be coordinated with required clear spaces and surrounding elements
- Requires review for the applicable project and jurisdiction
- Cannot be established by changing one toe kick dimension
Do not apply dimensions quoted by secondary design articles as universal accessibility requirements. For an accessible workstation, consult the current official U.S. Access Board materials, applicable local requirements, and the responsible project professional. Evaluate the complete layout rather than one recess beneath one cabinet.
Final pre-order and pre-installation checklist
Use this checklist before ordering cabinets, platforms, legs, plinths, or toe kick panels.
Cabinet and countertop stack
- [ ] Selected cabinet manufacturer, line, and construction method confirmed
- [ ] Current cabinet-system drawing obtained
- [ ] Approved dimensioned side section completed
- [ ] Target finished counter height recorded
- [ ] Cabinet-box or cabinet-side height recorded
- [ ] Countertop finish thickness confirmed
- [ ] Substrate, buildup, and support thickness included
- [ ] Planned toe kick height shown
- [ ] Planned recess depth shown
- [ ] Every measurement reference plane labeled
- [ ] Cabinet box, face, overlay front, and countertop edge dimensioned separately
Floor and leveling conditions
- [ ] Subfloor datum or elevation recorded
- [ ] Finished-floor material identified
- [ ] Total floor buildup calculated
- [ ] Highest and lowest floor points measured
- [ ] Finished-floor elevation used for visible toe kick height
- [ ] Cabinet leveling allowance included
- [ ] Adjustable-leg range checked against the selected product
- [ ] Plinth cutting or scribing allowance included
- [ ] Visible toe kick checked at both ends of each run
Appliances and cabinet fronts
- [ ] Current dishwasher installation instructions reviewed
- [ ] Other under-counter appliance instructions reviewed
- [ ] Appliance openings dimensioned from the finished floor
- [ ] Appliance adjustment ranges confirmed
- [ ] Installation and removal paths documented
- [ ] Range or refrigerator alignment checked where relevant
- [ ] Door and drawer alignment checked
- [ ] Overlay-front thickness included
- [ ] Countertop overhang dimensioned separately
- [ ] Ventilation and service clearances verified from product instructions
Ends, transitions, and special conditions
- [ ] Exposed cabinet ends documented
- [ ] Islands and peninsulas detailed on every side
- [ ] Appliance breaks identified
- [ ] Tall-cabinet transitions identified
- [ ] Decorative ends identified
- [ ] Changes between recessed and flush bases documented
- [ ] Accessible sections separately detailed and reviewed
- [ ] Vents, grilles, heaters, or utility penetrations located
- [ ] Removable access panels identified
They must also clear cabinet doors, appliance panels, floor irregularities, and circulation paths. The existence of a nominal recess does not mean a drawer will fit a particular cabinet system.
Lighting, ventilation, and utility components require advance planning as well. Show wiring routes, drivers or transformers, grilles, supports, plumbing access, attachment methods, and removable panels before production. Drawers and projecting components need unobstructed movement; vents need unobstructed airflow; lighting components need a serviceable location. The Cabinet Coach outlines these coordination needs for drawers, lighting, ventilation, flooring, and appliances.
Where an appliance, utility, vent, or electrical component requires access, specify a removable plinth section if the selected cabinet system permits one. Mark its seams and fasteners so future service does not depend on damaging a continuous finished panel.
Decision rule: Use common toe kick dimensions only for early planning. Use current approved cabinet drawings, appliance instructions, project requirements, and verified field conditions for ordering and installation.
Frequently asked questions
Is 4 inches a standard toe kick height?
Four inches is a frequent planning starting point, but it is not a universal standard. Published residential examples also report 3, 3.5, and 4.5 inches in particular products or designs. Manufacturer guidance commonly presents 3.5 to 4 inches as a typical range rather than a mandatory dimension. Long Island Wood Renewal summarizes that reported residential range.
Begin with a preliminary range, then verify the selected cabinet construction, finished floor, box height, countertop assembly, levelers, and appliances.
What is the typical depth of a kitchen cabinet toe kick?
Approximately 3 inches is a commonly reported recess depth, while published examples extend from roughly 2 to 4 inches. The exact result depends on the cabinet system and measurement plane.
Depth from the cabinet face to the recessed skin is the cabinet recess. Measurements from an overlay door, drawer front, or countertop edge will be different and should be labeled separately.
Does flooring installed after the cabinets reduce toe kick height?
Yes—if the new flooring raises the surface in front of the cabinets. The visible toe kick height is reduced by the floor buildup.
For example, adding 0.75 inch of flooring in front of a nominal 4-inch opening leaves 3.25 inches visible. The same buildup may reduce an under-counter appliance opening, so document the final floor elevation and appliance-removal path before installation.
Can a taller toe kick affect dishwasher clearance or countertop height?
Yes. If the cabinet box remains fixed, a taller toe kick raises the countertop unless another component changes. If the finished counter must remain at the same height, a taller toe kick generally requires a shorter cabinet box.
Either approach can affect appliance openings, adjacent alignment, doors, drawers, and countertop installation. Check the selected appliance manuals and approve the complete side section rather than changing only the plinth dimension.
Can toe kick space be used for drawers, lighting, or ventilation?
Potentially. Some cabinet designs use the area for shallow drawers, lighting, vents, heaters, or service access. Feasibility depends on the cabinet structure, usable space, neighboring appliances, required airflow, door clearances, wiring, and maintenance needs.
Design these features before production. Provide removable sections where service is required, and confirm that drawers or projecting parts will not conflict with appliance doors or circulation.
Final takeaway
For a conventional residential kitchen, a practical preliminary assumption is 3.5 to 4 inches high with a recess around 3 inches deep. Do not order from that rule of thumb alone.
Measure from the finished floor, calculate the complete cabinet-and-counter stack, check the selected cabinet and appliance documents, and resolve flooring, levelers, appliance breaks, transitions, custom bases, and accessibility conditions on an approved dimensioned side section.