
Countertop Overhang Varies by Use and Support
Non-seating edges commonly project 1-1.5 inches. Seating choices are about 12, 15 or 18 inches; unsupported span needs separate approval.
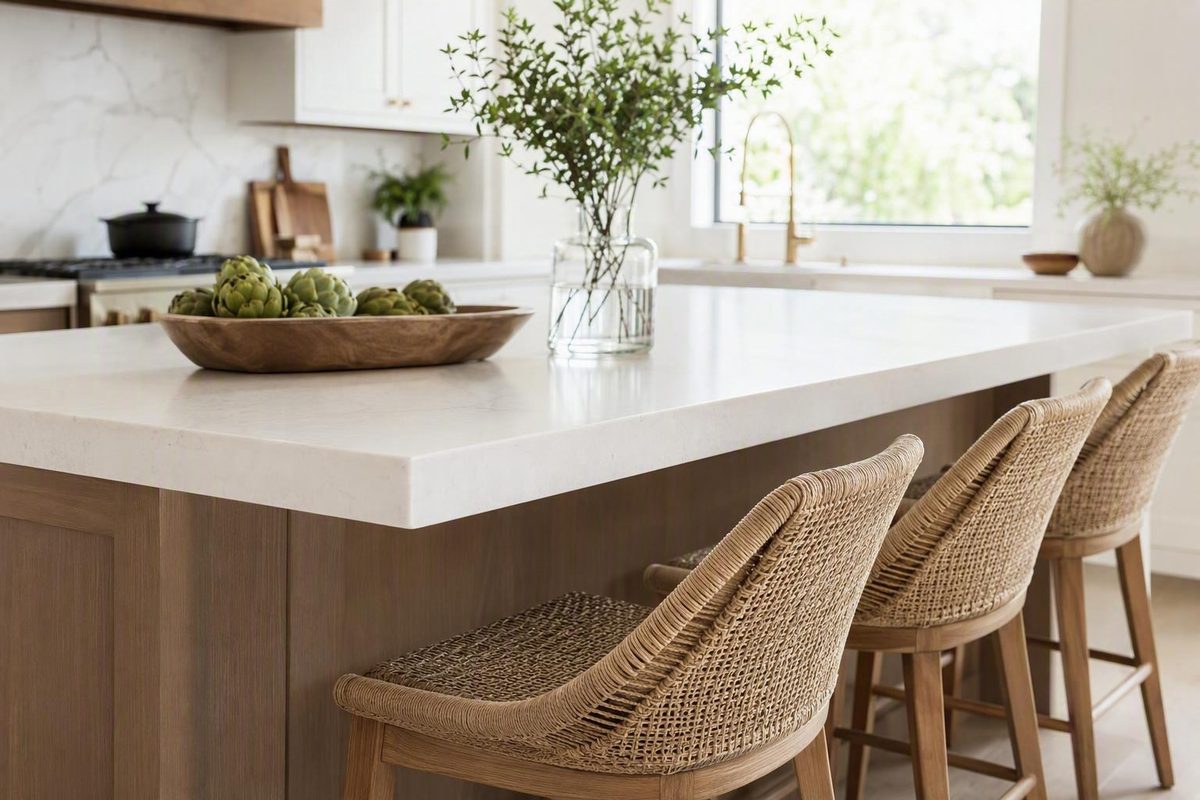
Most non-seating countertops extend about 1 to 1.5 inches beyond the cabinet face. Seating overhangs commonly begin around 12 inches, while 15 or 18 inches may provide more knee room or allow some stools to fit farther beneath the top. These are planning conventions, not universal structural limits (countertop overhang dimensions by use).
Choose a countertop overhang by separating three decisions:
- How much projection is appropriate at an ordinary cabinet edge?
- How much knee room do the intended users and stools need?
- How much of the selected countertop may project beyond its support, and what reinforcement does the complete assembly require?
Keeping these questions separate prevents a comfortable seating dimension from being mistaken for a structurally approved unsupported span.
What countertop overhang means—and where to measure it
A countertop overhang is the portion of the top extending beyond the cabinet, pony wall, island base, or other structure directly supporting it. If the finished edge ends in the same vertical plane as the cabinet, the countertop is flush rather than overhanging.
Overhang depth is not the same as total countertop depth. The overhang is only the projection beyond the supporting structure. Total depth includes the cabinet or base plus any projections on either side.
A small front overhang helps direct spills and crumbs past cabinet faces, provides clearance beyond doors and protruding hardware, conceals minor variations in cabinet alignment, and creates a finished edge. Chisel Marble & Granite describes the usual residential projection as approximately 1.5 inches and identifies these practical reasons for using it (countertop overhang and flush-edge guidance).
Label four measurements on the plan:
- Cabinet or base depth: The depth of the supporting cabinet, wall, or island structure.
- Front or non-seating overhang: The small projection beyond doors and drawers.
- Seating overhang: The deeper projection intended to provide knee and leg space.
- Total countertop depth: The full distance from one finished countertop edge to the other.
Simplified section view—not a structural detail:
Working side                                                Seating side

 finished edge                                                  finished edge
      |                                                               |
      v                                                               v
  +---+================ countertop ================================+---+
  |<->|<---------------- cabinet or base ------------------------->|<->|
 front                                                               seating
overhang                                                            overhang
      ^                                                               ^
      |                                                               |
      +------------------- total countertop depth --------------------+

The support transition is the line where the cabinet or approved
structural base ends and the seating projection begins.
A perimeter countertop measuring 25 to 25.5 inches from its wall-side edge to its front edge does not have a 25-inch overhang. With a 24-inch-deep base, only the final 1 to 1.5 inches beyond the cabinet face is the front overhang.
Measure from the actual supporting plane—not automatically from a door, molding, filler, or decorative panel. A door may project beyond the cabinet box, while a finished panel may conceal structural framing without being structural itself. The cabinet installer and countertop fabricator should identify the approved support line on the drawing.
At an island, dimension the cabinet and countertop separately. A note that says only “36-inch island” is ambiguous unless it specifies whether the measurement describes the cabinet, countertop, or complete footprint.
Quick-reference overhang dimensions by use
The following dimensions are planning guidelines. They are not code requirements, structural approvals, or guarantees of comfort.
| Use | Typical seating height | Planning overhang | Likely comfort and use | Stool-storage effect | Structural review |
|---|---|---|---|---|---|
| Perimeter counter without seating | Not applicable | 1–1.5 in. (ordinary overhang guidance) | Conventional standing work surface | None | Confirm the finished edge and product details |
| Island without seating | Not applicable | 1–1.5 in. (island and perimeter guidance) | Finished edge with modest cabinet clearance | None | Confirm with the fabricator |
| Compact island or peninsula seating | Usually counter or bar height | About 12 in. (island seating guidance) | Common starting point for constrained plans or occasional use | Some stools may remain partly exposed | Yes |
| Everyday counter-height seating | About 36 in. high | About 15 in. (counter-height island guidance) | More knee room for frequent dining | May allow more of some stools to fit below the top | Yes |
| Deep seating or greater stool storage | Depends on surface height | 15–18 in. (extended island-overhang guidance) | Generous potential legroom | More likely to accommodate deeper stools | Project-specific support approval required |
| Table-height seating | Approximately 28–30 in. high | About 18 in. (seating-height guidance) | Deeper knee space for the lower seating position | Depends on chair depth and supports | Yes |
| Bar-height seating | Approximately 41–43 in. high | About 12 in. (seating-height guidance) | Shallower knee-space guidance reflects the higher seat position | Depends heavily on stool geometry | Yes |
For an ordinary perimeter counter or island without seating, approximately 1 to 1.5 inches is the common convention. Seating changes the function of the projection: the countertop must accommodate knees, legs, and the stool rather than simply finish the cabinet edge.
About 12 inches is a common starting point for island or peninsula seating. It should not be treated as a universal minimum, an assurance of comfort, or permission to leave the entire projection unsupported.
At standard counter height, approximately 15 inches may be a better planning choice for frequent dining, taller users, or stools with deeper seats. An 18-inch projection creates more potential legroom and may conceal more of a stool, but every additional inch enlarges the countertop footprint.
The general ergonomic pattern is approximately 18 inches at table height, 15 inches at counter height, and 12 inches at bar height. These relationships help with early planning, but the actual users and stools still need to be tested.
A deeper overhang can also:
-
Consume aisle or walkway space.
-
Increase the projection that the support design must address.
- Require brackets, steel, framing, posts, or another approved support system.
- Alter the proportions of the island.
- Introduce supports that compete with knee room.
Select a preliminary depth from the table, test it against the room and furniture, and then obtain project-specific structural approval.
Choosing between a 12-, 15-, and 18-inch seating overhang
There is no universally ideal seating overhang. Twelve, 15, and 18 inches represent different balances among comfort, footprint, stool storage, and support requirements.
A 12-inch overhang is the compact option. It may work well for:
- Occasional breakfasts or short visits.
- Smaller users.
- Backless stools with compact bases.
- Bar-height seating.
- Kitchens where preserving aisle space is important.
- Peninsulas beside a frequently used route.
Its limitation is that some adults may need to sit farther from the countertop or angle their legs. A deep seat, broad back, projecting footrest, or large stool base may also prevent the stool from fitting beneath the top.
A 15-inch overhang is often a stronger candidate for regular counter-height dining. The additional three inches can give taller users and people with longer thighs more room to sit close to the counter without contacting the cabinet.
That extra depth enlarges the island by three inches unless the cabinet depth or opposite projection is reduced. It can therefore move the finished edge closer to an appliance, doorway, wall, table, or traffic route.
An 18-inch overhang is a deep option. It may create a more table-like seating position or allow some stools to slide farther under the countertop. It also requires enough floor-plan space and early coordination of the countertop, cabinetry, and support system.
Stool storage is not determined by overhang depth alone. A stool’s back, seat depth, base, swivel envelope, and footrest may prevent full storage. Corbels, brackets, or posts can obstruct the intended parking position.
Comfort also varies with:
- User height and body proportions.
- Thigh and lower-leg length.
- Stool seat height and depth.
- Footrest height and location.
- Countertop height.
- Cabinet shape below the seating area.
- Supports or aprons beneath the top.
- How long people expect to remain seated.
Homeowner reports illustrate this variability rather than establish a standard. In one Houzz discussion, some participants preferred approximately 15 inches for counter-height comfort, while others found 10 to 12 inches adequate when walkway space was more important (homeowner experiences with seating overhangs).
Before fabrication, make a full-size mock-up:
- Mark the supporting cabinet edge on the floor with painter’s tape.
- Mark countertop edges at 12, 15, and 18 inches.
- Use cardboard or a temporary board at the intended countertop height if possible.
- Place the actual stools in position.
- Ask intended users to sit, turn, rise, and reach the counter.
- Check how far occupied stools and seated users project into the room.
- Open nearby doors, drawers, and appliances.
- Mark proposed corbels, brackets, or posts to identify conflicts.
Do not test only the unoccupied island. A stool pushed beneath the countertop represents storage, not use. The more important test includes the seated person and the route behind them.
A successful mock-up establishes only that the arrangement may be comfortable. It does not establish how much of the countertop can remain unsupported.
Calculate total countertop and island depth before finalizing the layout
Use this formula for a straight countertop section:
Base or cabinet depth + overhang on one side + overhang on the opposite side = total countertop depth
Include a projection only where one actually exists. If the rear edge ends at a wall without extending beyond its support, the rear-overhang term is zero.
Perimeter example
- Base cabinet depth: 24 inches
- Front overhang: 1.5 inches
- Rear projection: 0 inches
24 + 1.5 + 0 = 25.5 inches total countertop depth
This is a 25.5-inch-deep countertop with a 1.5-inch overhang—not a 25.5-inch overhang.
Island with a 12-inch seating overhang
- Cabinet depth: 24 inches
- Seating overhang: 12 inches
- Opposite working-side overhang: 1.5 inches
24 + 12 + 1.5 = 37.5 inches total countertop depth. This combination is also used as an example in countertop-planning guidance.
Using the same cabinet and opposite-side projection:
- 24 + 15 + 1.5 = 40.5 inches total depth
- 24 + 18 + 1.5 = 43.5 inches total depth
Increasing the seating overhang by three inches increases the finished footprint by three inches unless another dimension changes. The cabinet remains the same, but the adjacent aisle becomes correspondingly smaller unless the island is moved.
The same formula applies to a peninsula. Curved, angled, or irregular tops need additional dimensions because the projection may change along the edge.
For seating length, approximately 22 to 24 inches of linear countertop per person is a useful initial estimate, subject to adjustment for the stools, supports, corners, and users (island seating-width estimate).
Adjust that estimate for:
- Stool width, including arms or broad bases.
- Space needed to swivel or pull out a stool.
- End panels and waterfall edges.
- Brackets, corbels, posts, or frame locations.
- Corners where two seating runs meet.
- User size and desired elbow room.
- Cabinets or appliances below adjacent sections.
Check the completed countertop footprint against doors, drawers, dishwasher fronts, refrigerator doors, ovens, and pull-out storage. Evaluate the work area with doors and drawers open, then evaluate circulation with stools occupied.
An island can fit geometrically while functioning poorly. A deep overhang may leave a generous aisle while stools are stored but create a bottleneck during meals. Conversely, saving three inches in the aisle may produce seating that the household rarely uses.
For underlying cabinet modules and broader layout planning, consult Cabinet Data’s kitchen-cabinet dimensions reference. Keep the cabinet and finished-countertop dimensions separate on the plan.
Comfortable seating depth is not the same as a safe unsupported span
There is no single unsupported-overhang number that is safe for every granite, quartz, quartzite, marble, sintered-stone, or other countertop installation.
The ergonomic question is:
How much knee and leg room will make the seating useful?
The structural question is:
How much of this specific countertop assembly may project beyond its support, and what reinforcement does it require?
A household may select a 15-inch overhang for comfort while the approved installation permits only part of that depth to remain unsupported. Brackets, steel, posts, framing, or another designed load path may therefore support much of the nominal overhang.
In general terms, a longer countertop projection creates greater leverage where the top passes from supported to unsupported. The implications for a particular installation cannot be determined from projection depth alone. Fabricator guidance identifies material, thickness, overhang depth and length, seams, cutouts, cabinets, anchoring, and support placement as relevant variables (fabricator guidance on overhang support).
The project review should consider:
- The countertop material and exact product.
- Actual structural thickness.
- Natural fissures, defects, repairs, or grain characteristics.
- Seams and their relationship to supports.
- Sink, faucet, or cooktop cutouts.
- Corners, curves, angles, and narrow sections.
- Unsupported length as well as projection depth.
- Cabinet construction, condition, anchoring, and level.
- Available blocking or structural framing.
- Support type, capacity, placement, and attachment method.
- Anticipated ordinary and concentrated loads.
Natural stone varies from slab to slab. Engineered quartz is manufactured, but installation requirements may still differ by product and manufacturer.
A 3-centimeter slab generally has more strength than a 2-centimeter slab, but thickness alone does not eliminate support requirements. A built-up edge can also make a countertop look thicker without increasing the structural thickness across the full slab.
Commercial countertop guides publish differing unsupported-span estimates, including figures around 8, 10, or 12 inches for selected materials and configurations. Those conflicting rules of thumb demonstrate why material category alone does not settle the question. They are not transferable guarantees.
The same caution applies to the idea that no more than one-third of a countertop should be unsupported. That screening rule does not account for the complete assembly, including seams, cutouts, slab condition, cabinet strength, support attachments, or loading.
Obtain final approval from:
- The selected countertop manufacturer, when product-specific instructions apply.
- The fabricator responsible for templating and installation.
- The cabinetmaker or installer responsible for the supporting base.
Specialty stone guidance likewise recommends fabricator confirmation and engineering review for exceptional wall-mounted or long-span designs (stone-overhang mechanics and review guidance).
This article provides planning questions, not a structural design method. The approved project documentation should identify the total overhang, the portion directly supported, the permitted unsupported projection, and the required attachments.
Support options for extended overhangs
The appropriate support system depends on structural capacity, attachment conditions, appearance, and usable knee space. A component touching the underside of a countertop is not necessarily an adequate support; the complete assembly needs an approved path into stable cabinetry, blocking, framing, a wall, or the floor.
Visible corbels and decorative brackets
Corbels and decorative brackets can complement traditional or furniture-style cabinetry. Their main planning drawback is interference: a deep corbel may occupy the same space needed for knees or stool storage.
Coordinate each support location with the planned seats before ordering the countertop.
Low-profile or concealed brackets
Concealed brackets can preserve a clean appearance and leave more usable space beneath the top. Depending on the approved design, they may be recessed into a cabinet, pony wall, or framed base.
“Hidden” does not mean unsupported. The brackets still need suitable attachment points identified by the cabinet installer, support supplier, fabricator, or engineer.
Recessed steel plates or bars
Steel plates or bars may be incorporated into the cabinet or substrate beneath the countertop. This can support an extended projection without large visible corbels, but it requires advance coordination.
Cabinet rails, blocking, channels, and fastener locations should be established before installation rather than improvised after the cabinetry is complete.
Posts or legs
Posts and legs provide direct support and can give an island a table-like appearance. Their tradeoff is obstruction: a poorly positioned post may eliminate a seat or prevent a stool from sliding into its intended location.
The project team must specify how the post connects to the countertop assembly and supporting structure.
Engineered or welded steel frames
A steel frame may be appropriate for an unusually deep or long projection. It can distribute support across the island while remaining relatively unobtrusive, but it must be designed around the actual cabinets, countertop, seams, cutouts, and attachment points.
Waterfall ends and extended panels
Treat a waterfall end as structural only when its material, substrate, connections, and installation have been designed to carry the load. A vertical countertop panel may be decorative rather than load-bearing.
The same caution applies to an extended cabinet side or finished panel. It may conceal reinforcement without functioning as reinforcement.
Do not adopt a universal bracket-spacing rule. Spacing depends on the support product’s capacity, countertop configuration, attachment method, unsupported length, seams, cutouts, and project-specific approval. All supports must connect to a level, stable, adequately anchored base.
Plan the overhang before cabinets are installed and the top is templated
Coordinate seating depth, total countertop dimensions, and structural supports during layout design. Confirm them before countertop templating or fabrication.
Use this pre-template checklist:
- Intended use: Standing work, occasional seating, daily meals, homework, entertaining, or mixed use.
- Seating height: Table, counter, bar, or another project-specific height.
- Actual stools: Width, seat depth, base depth, back, swivel envelope, and footrest position.
- Number of seats: Including corner and end positions.
- Storage goal: Whether stools should tuck fully, partly, or not at all beneath the top.
- Cabinet depth: Measured at the approved supporting plane.
- Both projections: Seating overhang and opposite-side overhang.
- Total countertop depth: Calculated and labeled separately.
- Circulation: Work routes, nearby doors, appliances, drawers, and movement behind occupied stools.
- Countertop product: Exact material, model, or slab selection where applicable.
- True thickness: Not simply the visual thickness of a built-up edge.
- Slab condition: Relevant fissures, repairs, or other features identified by the fabricator.
- Seams and cutouts: Their locations relative to the support arrangement.
- Geometry: Corners, narrow sections, curves, angles, and irregular runs.
- Support type: Corbels, brackets, bars, plates, posts, frames, or an approved combination.
- Attachment points: Cabinet rails, structural panels, blocking, framing, pony walls, or floor connections.
- Cabinet anchoring: How the island or peninsula will be fixed and stabilized.
- Approval responsibility: Who confirms each part of the installation.
The cabinetmaker or installer should identify where every support will attach and whether additional blocking or framing is required. A drawing note that merely says “add brackets as needed” does not resolve those details.
Mark support locations against the proposed seats. Corbels or posts may be structurally acceptable yet make the seating unusable if they occupy knee or stool space.
Sinks, cooktops, seams, corners, curves, and narrow countertop sections should be included in the fabricator’s review even when the nominal overhang remains unchanged. Document who is approving:
- Cabinet reinforcement and anchoring.
- Support model, capacity, attachment, and placement.
- Countertop product and true thickness.
- Supported and unsupported projections.
- Seams and cutouts.
- Final fabrication and installation details.
Manufacturer instructions, fabricator requirements, engineering recommendations, accessibility criteria, and locally applicable rules may override general planning ranges. Accessibility planning involves more than choosing an overhang depth and must be evaluated under the requirements applicable to the project.
Do not defer support planning until after installation. Access may be restricted, required blocking may be absent, and alterations may affect the countertop or cabinets. Fabricator guidance recommends resolving supports during measurement and fabrication planning rather than treating them as an afterthought (planning countertop support before installation).
Check an existing overhang for movement, sagging, or cracks
An installed countertop overhang warrants prompt professional evaluation if it shows:
- Hairline cracks near the transition between supported and unsupported countertop.
-
Visible sagging along the outer edge.
-
Cracking or popping sounds.
Specialty stone guidance identifies cracking near the support transition, visible sagging, and cracking sounds as warning signs that justify prompt fabricator assessment (warning signs in a stone countertop overhang).
Contact the original fabricator if possible. It may have records of the material, fabrication, supports, and installation. If that company is unavailable, consult another qualified countertop professional.
Do not rely on a universal do-it-yourself retrofit. Whether supports can be added depends on:
- Access beneath and behind the countertop.
- Cabinet condition and anchoring.
- Existing blocking or framing.
- Countertop material and slab condition.
- Seams and cutouts.
- Space and material available for fasteners.
- The support manufacturer’s attachment requirements.
- Whether proposed alterations could damage the top or cabinetry.
A bracket fastened only to a decorative skin, thin finished panel, or unsupported filler should not be assumed to create a reliable load path. Have the attachment conditions inspected before selecting a retrofit.
Movement, sagging, separation, sounds, or changing damage should receive professional review, and uncertain conditions should not be dismissed without assessment.
Conclusion
Choose a countertop overhang by separating the ordinary cabinet-edge projection, the desired seating depth, and the approved unsupported projection.
Start around 1 to 1.5 inches for non-seating edges. For seating, compare approximately 12, 15, and 18 inches according to the surface height, users, stools, and available room. Calculate the complete countertop footprint, mock up occupied seating, and check surrounding doors, appliances, and circulation.
Before templating, have the manufacturer, fabricator, and cabinet installer confirm the countertop, support system, attachment points, and final dimensions. A comfortable overhang is not necessarily a structurally approved one.
Frequently asked questions
What is the standard countertop overhang when there is no seating?
About 1 to 1.5 inches beyond the cabinet face is the common residential convention for perimeter counters and islands without seating. It creates a finished edge and helps direct spills and crumbs beyond cabinet fronts.
The exact dimension may change with the edge profile, doors, panels, walls, appliances, and fabricator requirements. Measure from the approved supporting plane rather than automatically measuring from a door or decorative molding.
Is a 12-inch countertop overhang enough for island seating?
It can be. Twelve inches is a common starting point and may work for occasional seating, compact stools, smaller users, bar-height seating, or layouts where aisle space is limited.
For frequent counter-height dining or taller users, approximately 15 inches may be more comfortable. An 18-inch overhang may provide additional legroom or stool storage, but it also enlarges the footprint and requires project-specific support approval.
Test the actual stools and intended users with a full-size mock-up before templating.
Does a quartz or granite overhang need brackets?
Possibly. The answer cannot be determined from “quartz” or “granite” alone.
Support requirements depend on the specific product or slab, true thickness, projection, unsupported length, seams, fissures, cutouts, cabinet construction, anchoring, anticipated loads, and support arrangement. Some short projections may be approved without separate brackets; deeper seating overhangs may use concealed steel, corbels, posts, or frames.
Follow product-specific instructions where applicable and obtain final approval from the fabricator. Unusual floating or long-span work may require engineering review.
How much countertop width should I allow for each island seat?
Use approximately 22 to 24 inches of linear countertop width per person as an initial planning estimate. Then adjust for stool width, arms, swivel movement, supports, corners, user size, and desired elbow room.
Also evaluate the depth of occupied seating and the circulation route behind it. Countertop width alone does not show how much room a seated person will use.
Can supports be added after the countertop is installed?
Sometimes, but retrofit feasibility must be evaluated rather than assumed. The installer needs access and a suitable attachment point in sound cabinetry, blocking, framing, or another approved structural base.
Seams, cutouts, countertop damage, cabinet condition, and island anchoring can complicate the work. Attaching a bracket to a decorative panel may not provide effective support, while drilling or recessing hardware may damage the countertop or cabinets.
Have the existing installation inspected by a qualified countertop professional. Seek engineering review when the span, damage, movement, or supporting structure is unusual.