
Pantry Cabinet Dimensions: Standard Sizes and Fit Checks
Compare common pantry heights, widths and depths, then account for fillers, door clearance, shelf space and delivery access before ordering your cabinet.
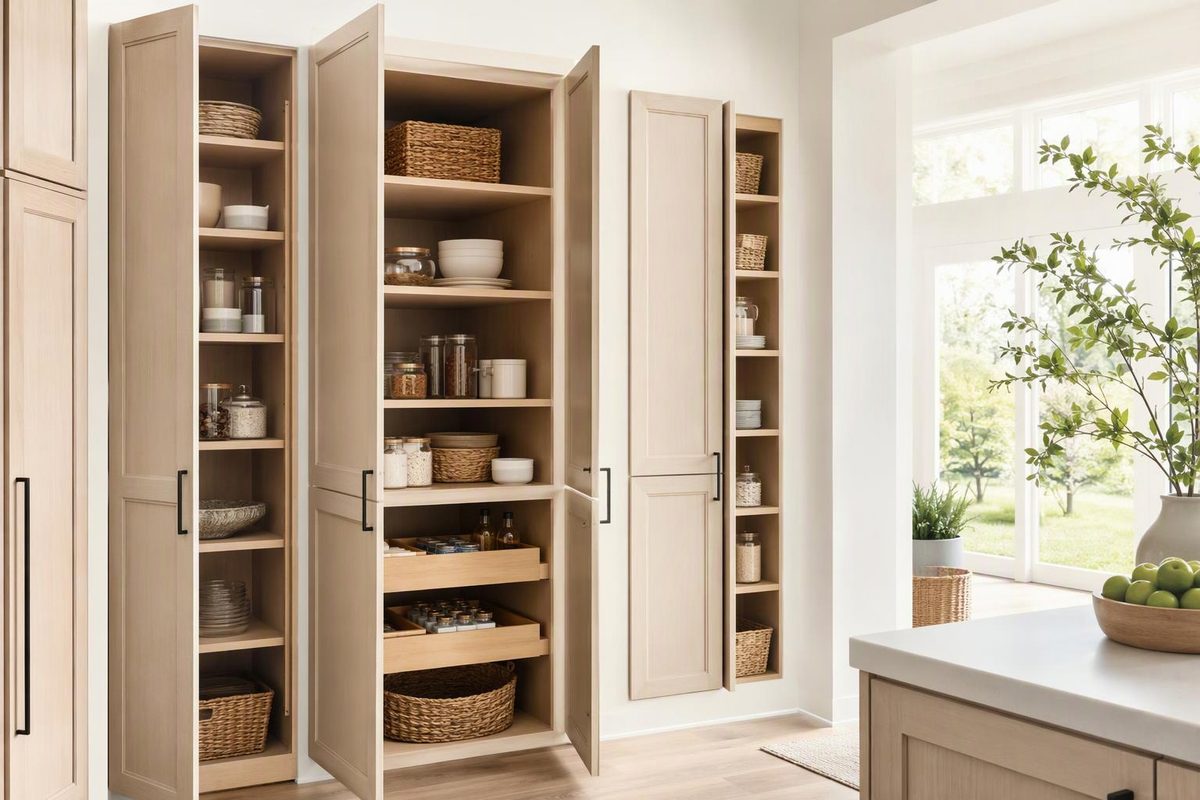
Common nominal pantry cabinet dimensions are 84, 90 or 96 in. high and 24 in. deep. Widths of 18, 24 and 30 in. are useful starting options; 36-in. specialty pantries and shallower 12-in. configurations are also available. These are planning dimensions for built-in North American kitchen cabinets, not a universal standard or a guarantee that every height, width and depth combination is offered. Choose the model only after checking its installed height, fillers, door clearance and usable storage.
Enter the cabinet width, total filler width and applied end-panel thickness to calculate the space reserved along the wall.
Pantry Wall-Space Calculator
Combine parts on both sides. Use 0 only when a part is confirmed unnecessary; leave unknown dimensions blank.
Planned Wall Space
25.75 in.
24 + 1 + 0.75 = 25.75 in.
Before any further allowance for an uneven wall. This total does not verify door clearance.
Source: article worked example. The 1-in. hinged-side filler requirement is specific to Simply Woodmark PRO; 0.75 in. is the example's applied panel, not a universal specification.
Common Pantry Sizes Are Starting Points, Not an Order Specification
| Dimension | Preliminary Sizes | What to Verify |
|---|---|---|
| Height | 84, 90, 96 in. | Toe kick, legs, leveling and top trim |
| Width | 18, 24, 30 in.; some 36 in. | Model, doors, fillers and end panels |
| Depth | 24 in.; some 12 in. | Doors, pulls and usable shelf depth |
| Other heights | Some 87 and 93 in. | Alignment with adjacent cabinet tops |
The Simply Woodmark PRO February 2025 specification guide lists 18- and 24-in.-wide utility cabinets, 24 in. deep, in all three main heights. A KraftMaid Momentum pantry listed by Lowe’s provides a 30-in.-wide example. KraftMaid’s manufacturer sizing guide describes 12- and 24-in. pantry depths and heights from 84 through 96 in. in 3-in. increments.
Those references establish available examples, not a single interchangeable size range. An 18-in. utility cabinet in one line does not establish that another line offers an 18-in. pantry with the same interior fittings. Likewise, a shallow pantry option does not mean every full-depth configuration has a shallow equivalent.
For ordering, record the manufacturer, product line and model beside the dimensions. Keep the cabinet’s listed size separate from the space assigned to it on the plan. The first describes the product; the second must also accommodate its installation parts and the objects around it.
Pantry Height Must Match the Cabinet Tops and Support System
Start with the intended top elevation, measured from the finished floor. If adjacent wall cabinets start at 54 in. above that floor, the alignment calculation is:
| Wall Cabinet Height | Cabinet-Top Elevation | Pantry-Top Target |
|---|---|---|
| 30 in. | 54 + 30 = 84 in. | 84 in. |
| 36 in. | 54 + 36 = 90 in. | 90 in. |
| 42 in. | 54 + 42 = 96 in. | 96 in. |
These are alignment examples, not mandatory mounting heights. KraftMaid specifically describes the 90-in. pantry/36-in. wall-cabinet pairing in its sizing guide. Use your actual wall cabinet mounting height, rather than assuming the example applies to your kitchen.
The calculation sets a target for the installed pantry top. It does not resolve whether a catalogue height includes the support beneath the cabinet. Check whether the selected cabinet uses an integral toe kick, a field-installed toe kick or separate legs, and how leveling affects the final elevation.
A 90-in. cabinet label does not necessarily mean a 90-in. finished installation. IKEA’s 15 × 24 × 90-in. SEKTION high cabinet is a frame requiring separate legs and plinth. Confirm the complete height assembly before comparing that frame with a cabinet sold using a different height convention.
Top trim needs its own decision. If the pantry and wall-cabinet boxes are meant to align, compare their box-top elevations first, then check how the chosen trim attaches. If the design instead aligns the finished trim, show both the box tops and trim tops on the elevation drawing. A shared ceiling height alone does not establish either alignment.
Ceiling Clearance Must Be Checked Across the Pantry Footprint
Measure the ceiling or soffit at several points along the proposed pantry location. The lowest overhead point and the floor’s high point matter more than a measurement taken elsewhere in the room. Account for flooring still to be installed before treating the available height as final.
American Woodmark’s installation guide directs installers to check the floor at several places, allow for future flooring thickness and verify fit below low ceilings or soffits. That makes the finished-floor reference essential: a measurement to an unfinished floor can overstate the space available for the completed installation.
A nominal 96-in. cabinet under a nominal 96-in. ceiling leaves no planned allowance for leveling or trim. Do not treat matching labels as proof of fit. Compare the selected cabinet’s complete installed assembly with the measured space, then confirm the installation method and any required clearance in that model’s instructions.
There is no universal ceiling allowance established by the cited examples. The needed space depends on the cabinet construction, support system, trim and method of raising it. Where those details are unknown, the remaining clearance is unresolved—not permission to order the tallest cabinet that matches the room’s nominal height.
Fillers and End Panels Increase the Required Wall Space
The planned wall-space requirement is cabinet width plus fillers plus applied end panels.
For example, a 24-in. pantry with a specified 1-in. wall filler and a 3/4-in. applied end panel occupies 25 3/4 in., before any further allowance for an uneven wall. A 24-in. opening is therefore not enough for that particular assembly, even though the pantry itself is called a 24-in. cabinet.
Use the calculator above with the actual parts assigned to your cabinet. If there are fillers or applied panels on both sides, enter their combined widths or thicknesses in the corresponding field. Enter zero only when the part is confirmed unnecessary; an unknown filler requirement should remain unknown.
A filler is functional, not just leftover space. Simply Woodmark PRO specifies at least a 1-in. filler between the hinged side of a full-overlay door and a deeper adjacent object, including a wall or appliance. That requirement comes from the product line’s specification guide; it is not a universal filler dimension for all cabinets or every neighboring condition.
Identify the hinged side before sizing the filler. Then check the selected hinges, handles and neighboring projections. A drawing that shows only the cabinet rectangle can conceal the part of the door or handle that approaches a wall as the door opens.
An applied end panel also needs to be distinguished from the cabinet’s own side. The calculator adds a panel installed outside the listed cabinet width. Do not add a side thickness already included in that width. Ask the supplier to identify which finishing parts increase the overall assembly dimension and which do not.
Cabinet Depth Does Not Describe Door or Pull-Out Clearance
Keep three depth measurements separate: nominal cabinet depth, closed installed projection and operating space. The nominal depth is the catalogue dimension. The closed projection runs from the wall to the outermost door or handle. Operating space is the room needed for doors, roll-outs or swing-out racks to open while someone stands in front.
For a listed 24-in.-deep cabinet, verify whether that measurement excludes the doors and pulls. The cited size examples do not provide a single door-and-handle allowance that can be added to every pantry. Use the chosen model’s drawing and the chosen hardware rather than assigning a generic finished projection.
Draw the operating space on the floor plan. Show the island, refrigerator and other nearby projections in the same view. Checking only the closed cabinet box can miss a collision that occurs when a pantry door or storage mechanism is in use.
A shallower 12-in. configuration may reduce the cabinet’s projection, but it is not automatically equivalent storage in a smaller footprint. Confirm its shelf depth, opening and interior arrangement. If the reason for choosing a shallow pantry is a restricted passage, check the finished projection and open-door condition as well as the nominal depth.
Usable Storage Depends on the Opening and Interior Fittings
Exterior dimensions do not establish usable shelf space. Request the clear opening width, internal depth and shelf spacing, then compare those dimensions with the containers and small appliances intended for the pantry. An item must fit through the opening as well as sit inside the cabinet.
The clear opening and the interior cavity answer different questions. A cabinet can have room behind the doors for an object that is awkward to pass through the opening. For pull-out storage, check the storage unit’s usable dimensions rather than assuming it occupies the full cabinet interior.
Choose any pantry mechanism before finalizing the cabinet. KraftMaid’s Multi-Storage pantry, for example, is a 36-in.-wide configuration with swing-out shelves and a specified 90-degree door opening. That width and opening requirement belong to that configuration; they do not establish the dimensions of every pantry with moving shelves.
For a mechanism-equipped pantry, obtain the operating drawing and compare it with the neighboring wall, appliance or island. Confirm that the door can reach the position required for the mechanism to work. A door that opens enough to reach a fixed shelf may still interfere with a swing-out assembly.
The cited exterior size references do not supply usable shelf dimensions for every model. Until the selected cabinet’s interior information is available, storage capacity remains unverified. Do not substitute the nominal 24-in. depth for the actual shelf depth in a storage plan.
Delivery and Uprighting Need a Separate Fit Check
A cabinet that fits once standing may not clear the ceiling while being raised upright. Treat final placement and installation access as separate checks. Measure the delivery route, including doorways, turns and any overhead restrictions, and confirm the dimensions of the unit that will actually be moved through it.
Ask whether the cabinet arrives as a complete tall assembly or with parts installed later. Simply Woodmark PRO’s 96-in. utility cabinets have a removable, field-installed toe kick. That construction detail may affect the installation sequence, but it should not be assumed for other heights, lines or manufacturers.
Have the installer confirm how the selected unit will be brought into the room and raised. The available standing height does not by itself answer that question. Nor does a removable toe kick resolve every delivery restriction: the remaining cabinet assembly still has to pass through the route and reach its installation position.
Confirm the Installed Envelope Before Ordering
The final order check should connect the model number to three verified dimensions: its complete installed height, its allocated wall-space requirement and its closed projection. Keep the door and storage-mechanism operating space on the drawing as a separate envelope.
That distinction prevents the most common planning mismatch: selecting a cabinet by nominal dimensions while leaving its support, finishing parts or moving components unaccounted for. An 84-, 90- or 96-in. height and an 18-, 24- or 30-in. width can narrow the search, but they cannot certify the installation.
Where a filler, support height, shelf dimension or opening clearance is still unknown, request that specific figure before releasing the order. The cabinet is ready to specify when the selected model—not just a common pantry size—fits the finished room, the intended storage and the delivery route.